> ## Documentation Index
> Fetch the complete documentation index at: https://docs.twenty.com/llms.txt
> Use this file to discover all available pages before exploring further.
# Quick Start
> Create your first Twenty app in minutes.
## Prerequisites
* **Node.js 24+** — [Download](https://nodejs.org/)
* **Yarn 4** — bundled with Node via Corepack. Enable it: `corepack enable`
* **Docker** — [Download](https://www.docker.com/products/docker-desktop/). Needed to run a local Twenty server. Skip if you already have Twenty running elsewhere.
Building a Twenty app has three phases. The scaffolder collapses them into one happy-path command, but each phase is a separate concept — when something fails, knowing which phase you're in tells you what to fix.
| Phase | What you do | Tool | Result |
| ------------------- | ---------------------------------- | ----------------------------- | ----------------------------- |
| **1. Scaffold** | Generate the app's source code | `npx create-twenty-app` | A TypeScript project on disk |
| **2. Run a server** | Start a Twenty server to sync into | Docker + `yarn twenty server` | A running Twenty instance |
| **3. Sync** | Live-sync your code to the server | `yarn twenty dev` | Your changes appear in the UI |
***
## Phase 1 — Scaffold your project
Create a new app from the template:
```bash filename="Terminal" theme={null}
npx create-twenty-app@latest my-twenty-app
```
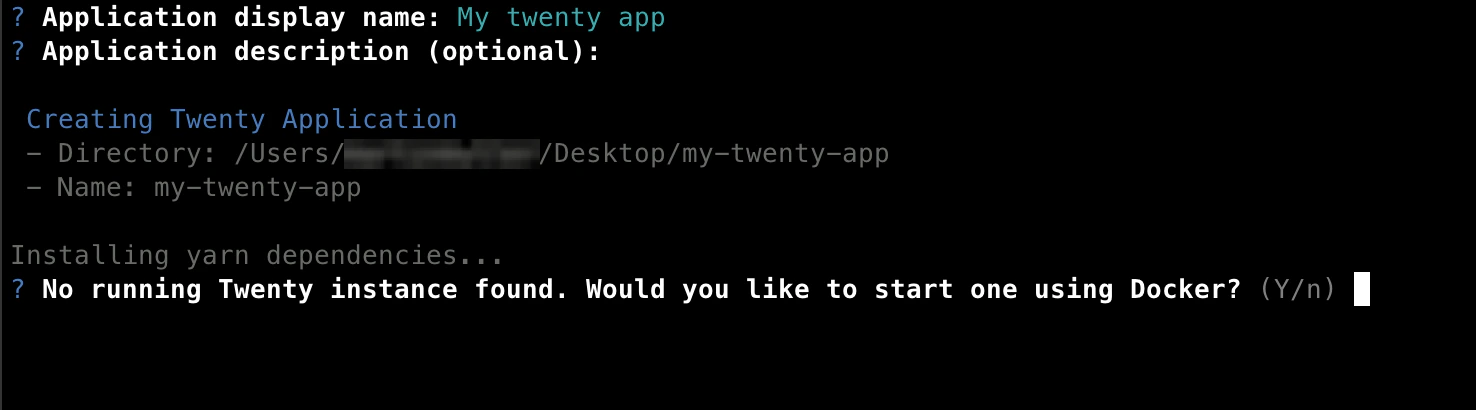
You'll be prompted for a name and description — press **Enter** for the defaults. This generates a TypeScript project in `my-twenty-app/` with a starter `application-config.ts`, a default role, a CI workflow, and an integration test.
**After this phase:** you have an app's source code on your machine. It isn't running yet — that's Phase 2.
***
## Phase 2 — Run a local Twenty server
Your app needs a Twenty server to sync into. The server is a full Twenty instance — UI, GraphQL API, PostgreSQL — running locally in Docker. Your local code uploads its definitions to that server, which makes them appear in the UI.
The scaffolder offers to start one for you:
> **Would you like to set up a local Twenty instance?**
* **Yes (recommended)** — pulls the `twentycrm/twenty-app-dev` Docker image and starts it on port `2020`. Make sure Docker is running first.
* **No** — choose this if you already have a Twenty server you want to connect to. You can wire it up later with `yarn twenty remote:add`.
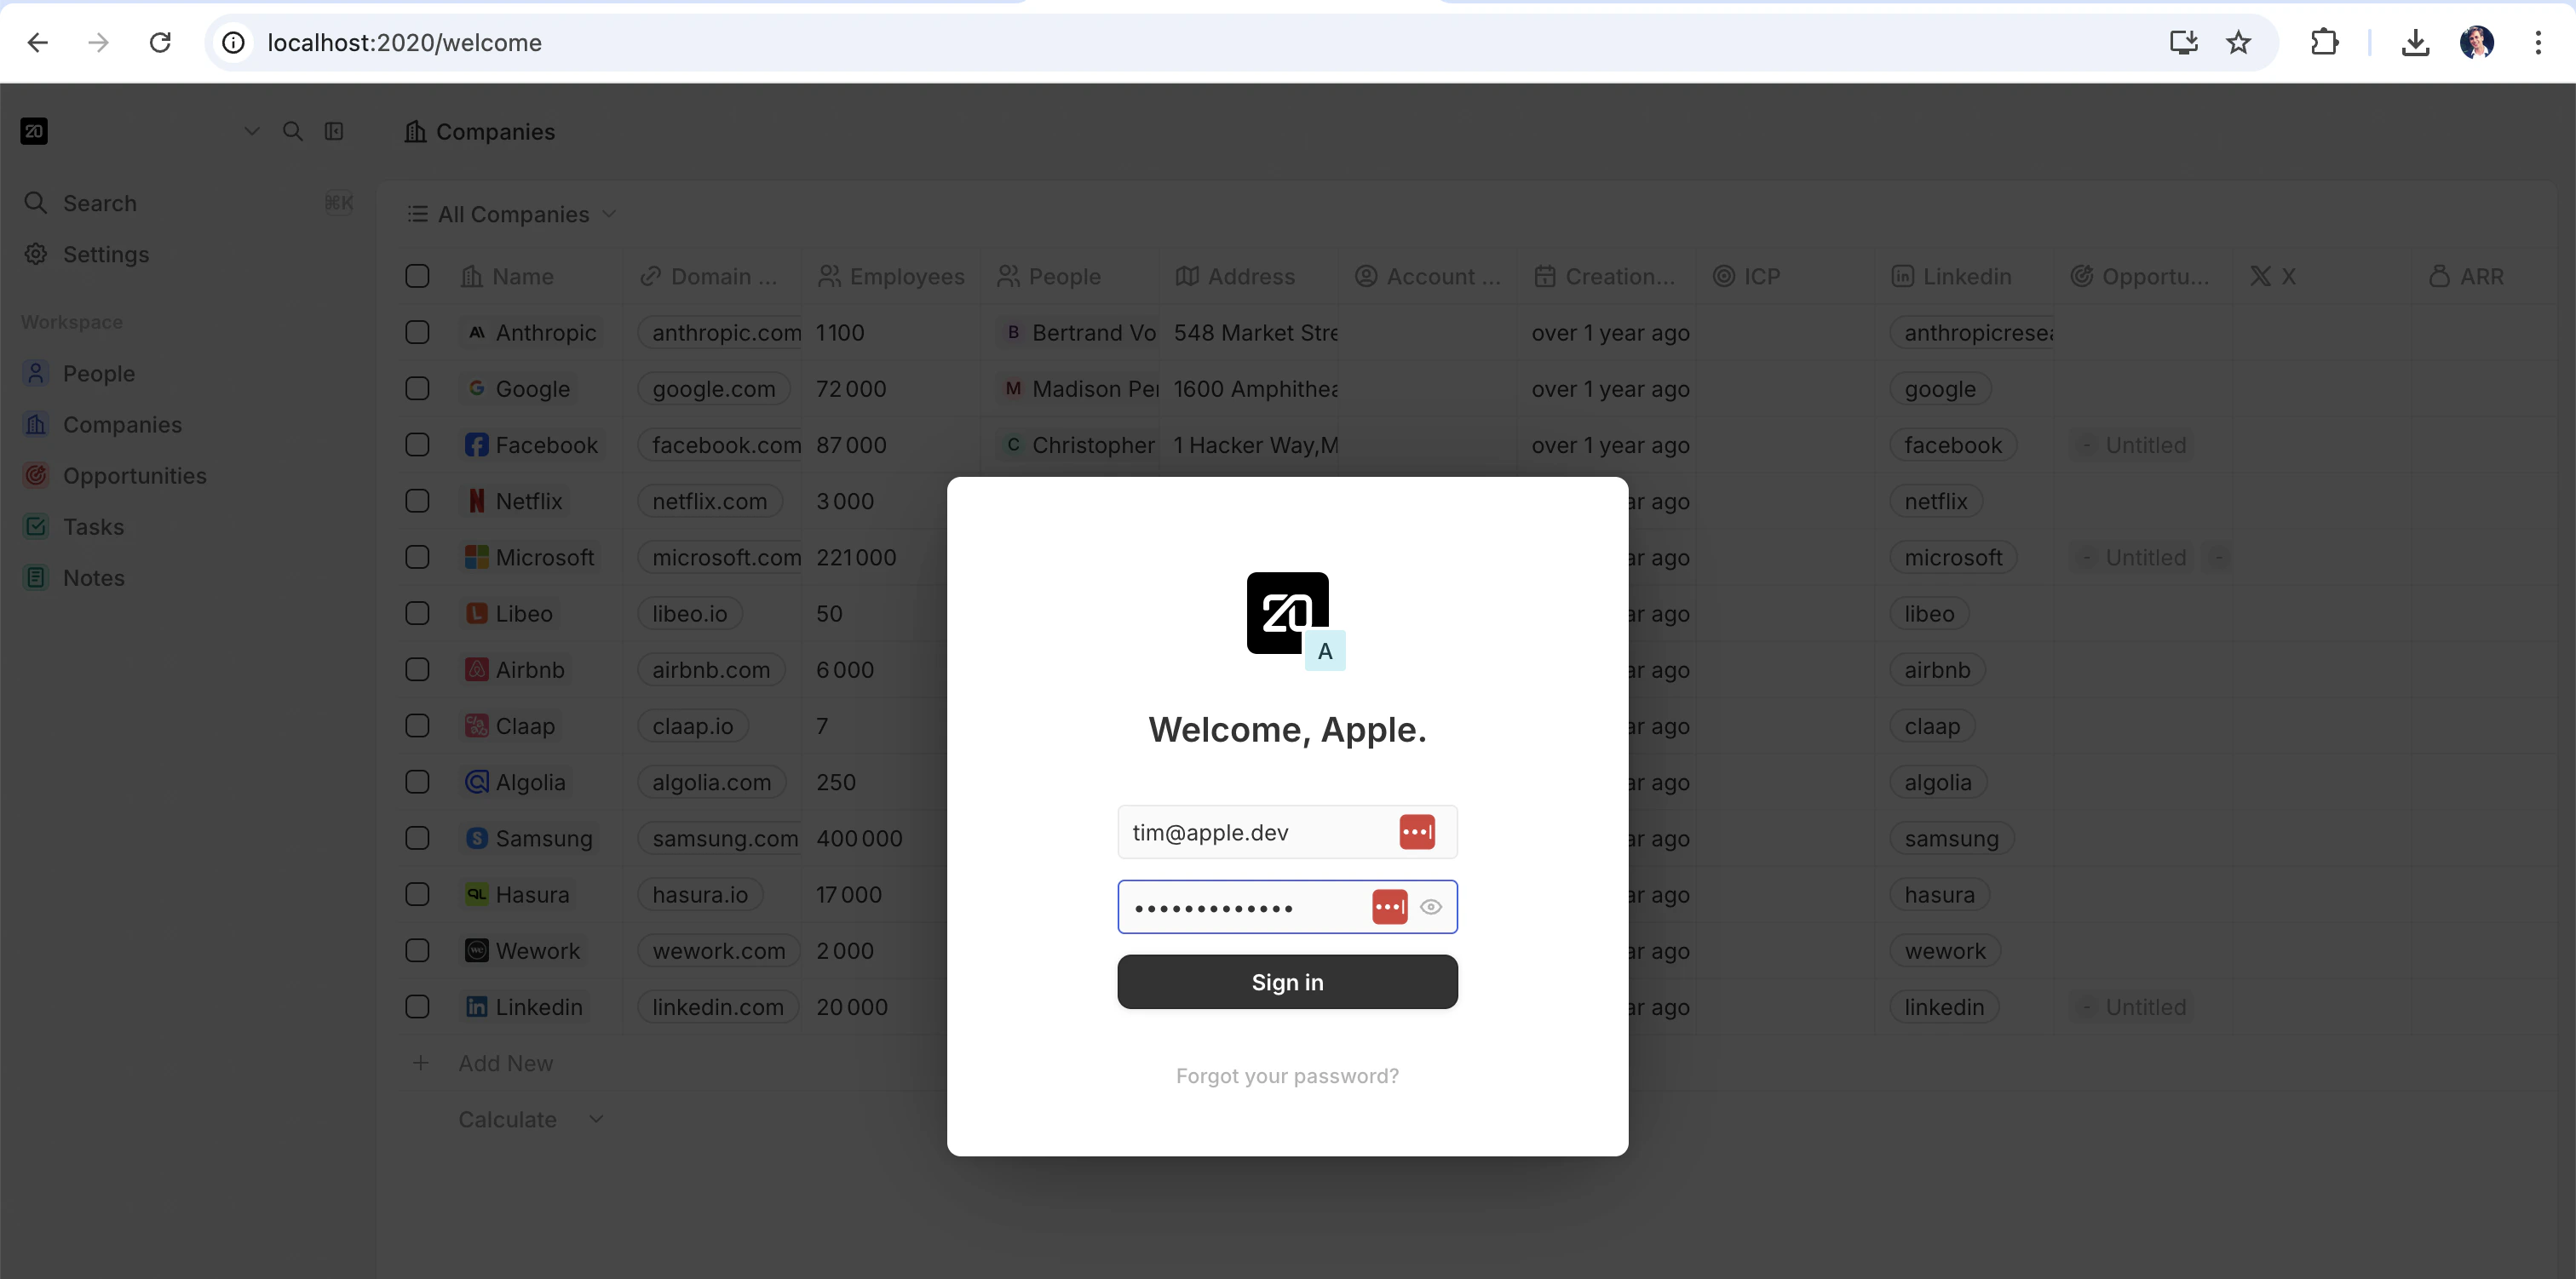
Once the server is up, a browser opens for sign-in. Use the pre-seeded demo account:
* **Email:** `tim@apple.dev`
* **Password:** `tim@apple.dev`
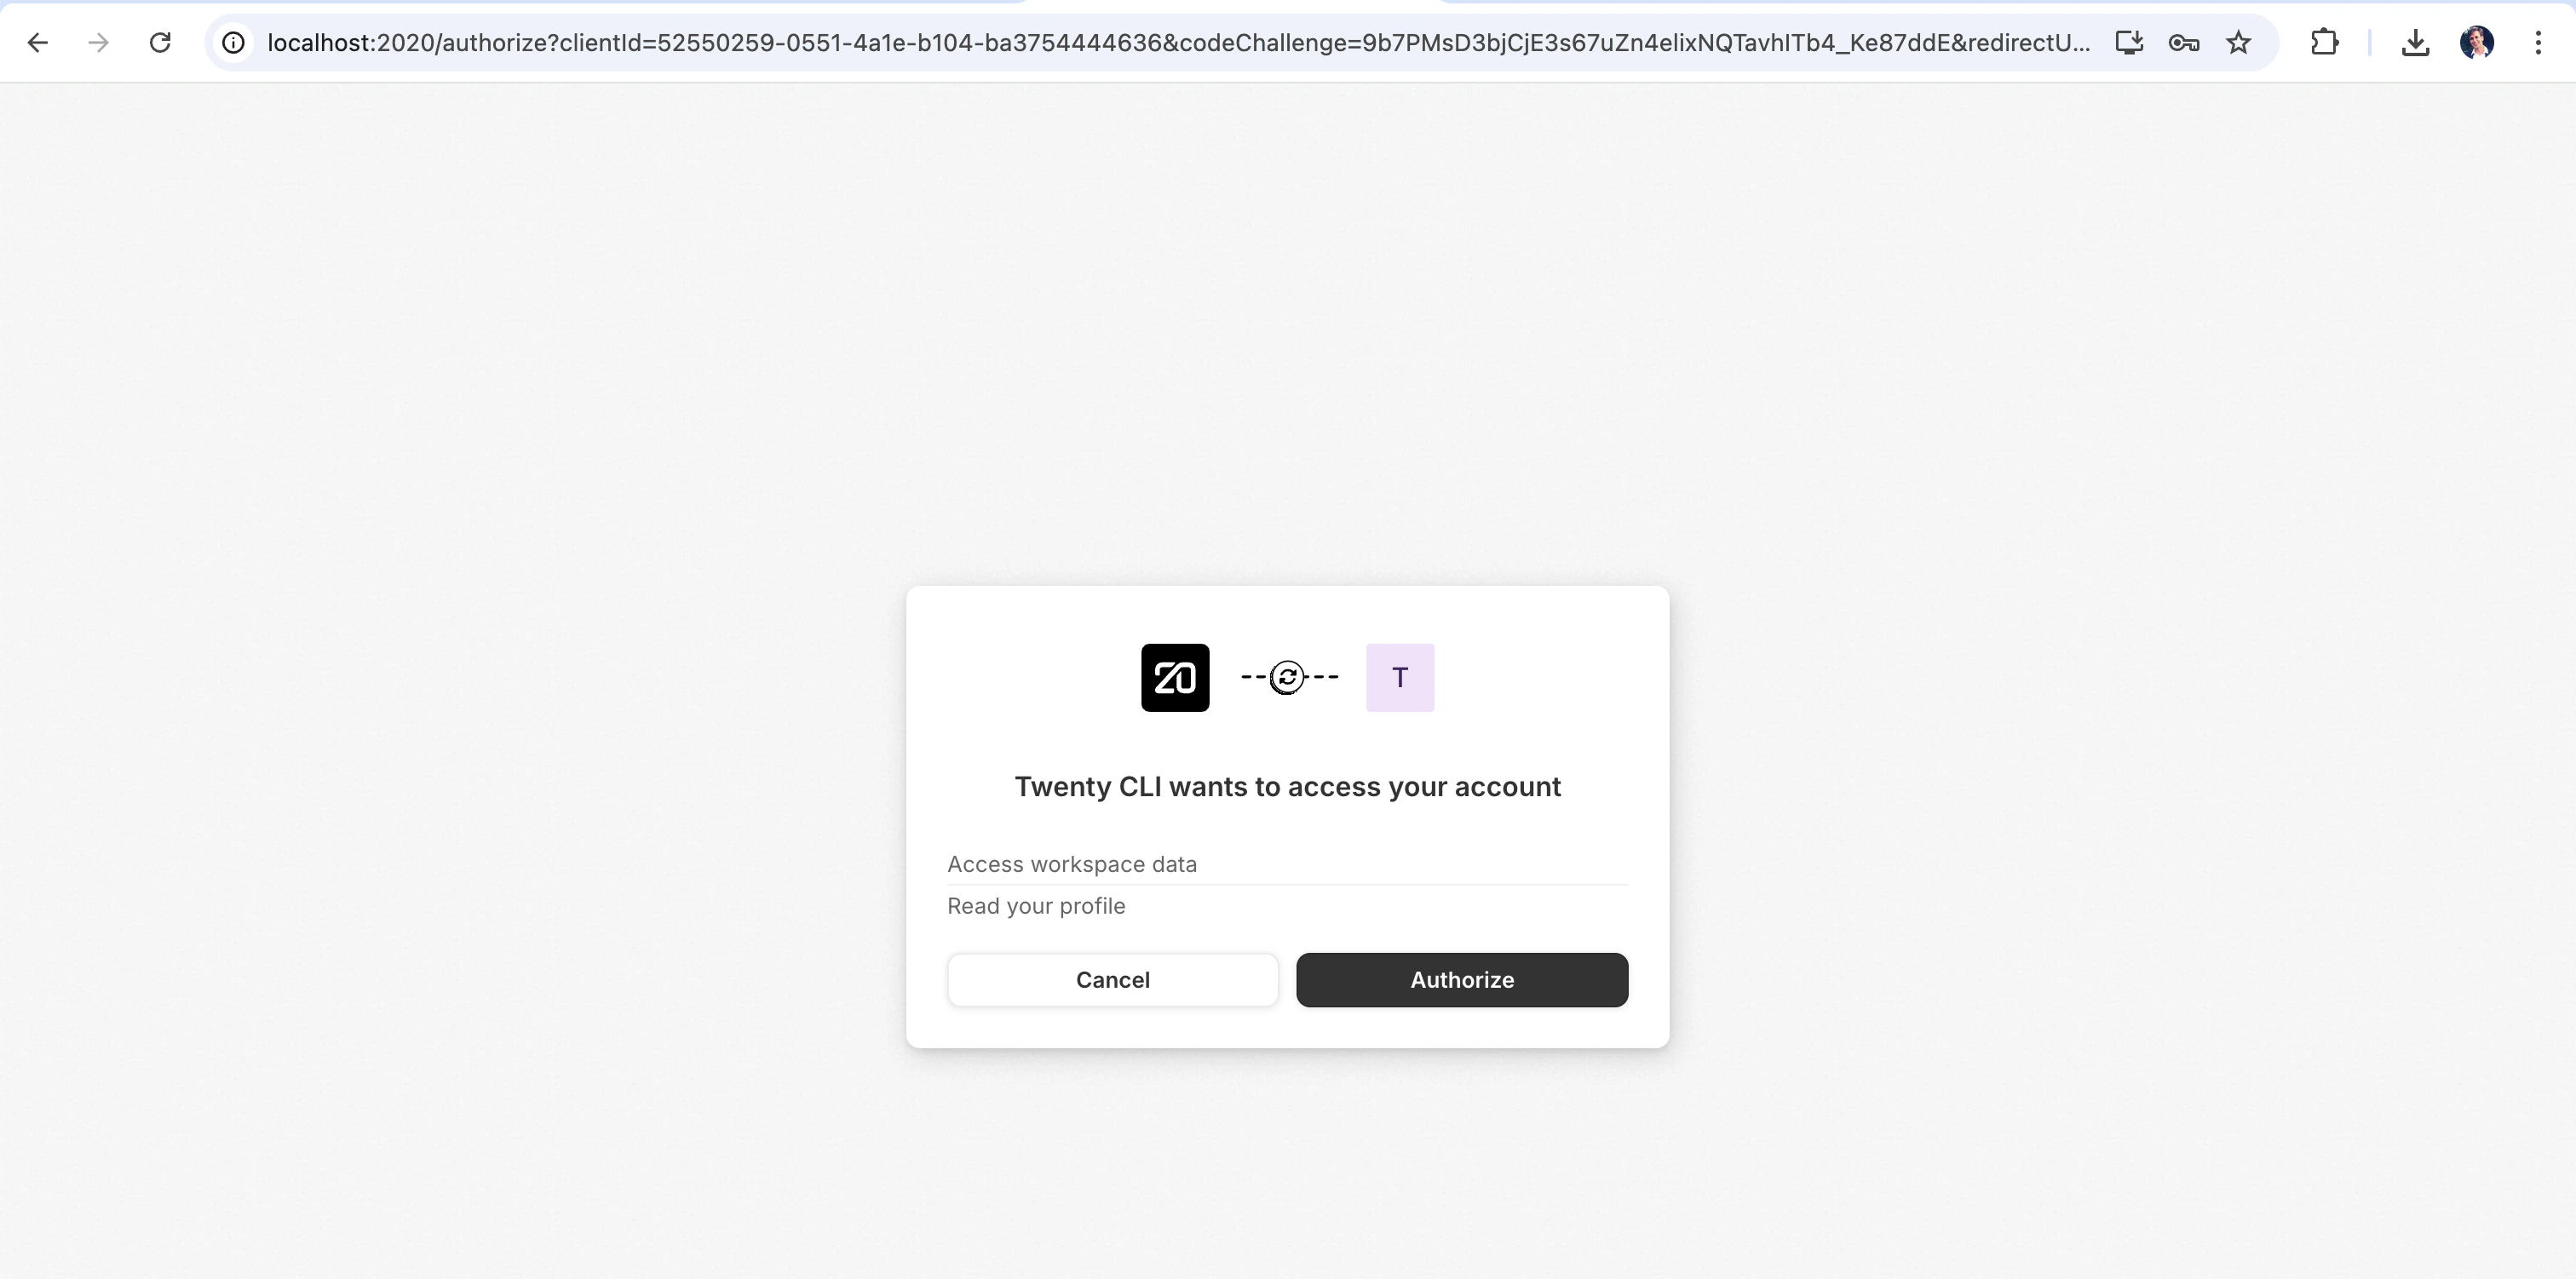
Click **Authorize** on the next screen — this gives the CLI access to your workspace.
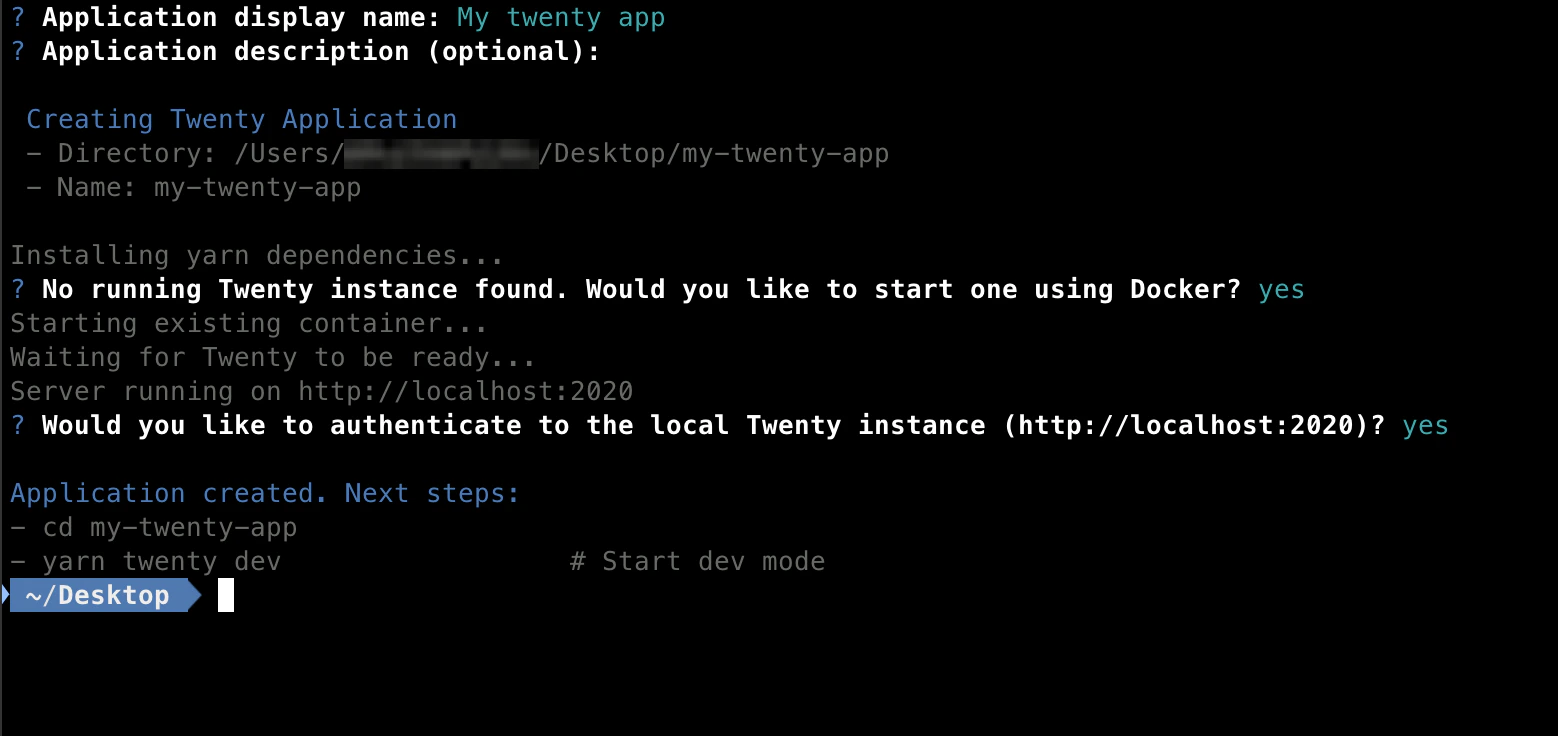
Your terminal will confirm everything is set up.
**After this phase:** you have a running Twenty server at [http://localhost:2020](http://localhost:2020) with your CLI authorized to sync to it.
If Docker isn't installed or running, the scaffolder will tell you the right start command for your OS. Once Docker is up, you can resume with `yarn twenty docker:start` — no need to re-scaffold.
***
## Phase 3 — Sync your changes
This is the inner loop you'll spend most of your time in.
```bash filename="Terminal" theme={null}
cd my-twenty-app
yarn twenty dev
```
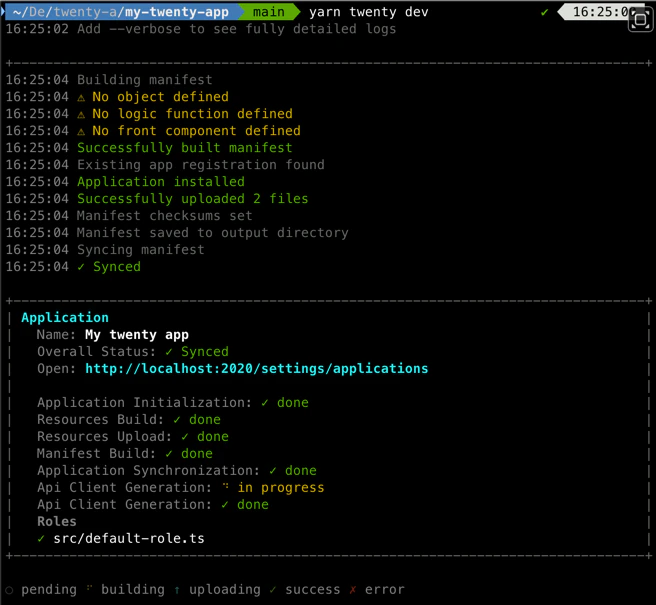
This watches `src/`, rebuilds on every change, and syncs the result to the server. Edit a file, save, and within a few seconds the server reflects the change. You'll see a live status panel in your terminal.
For more detailed output (build logs, sync requests, error traces), add `--verbose`.
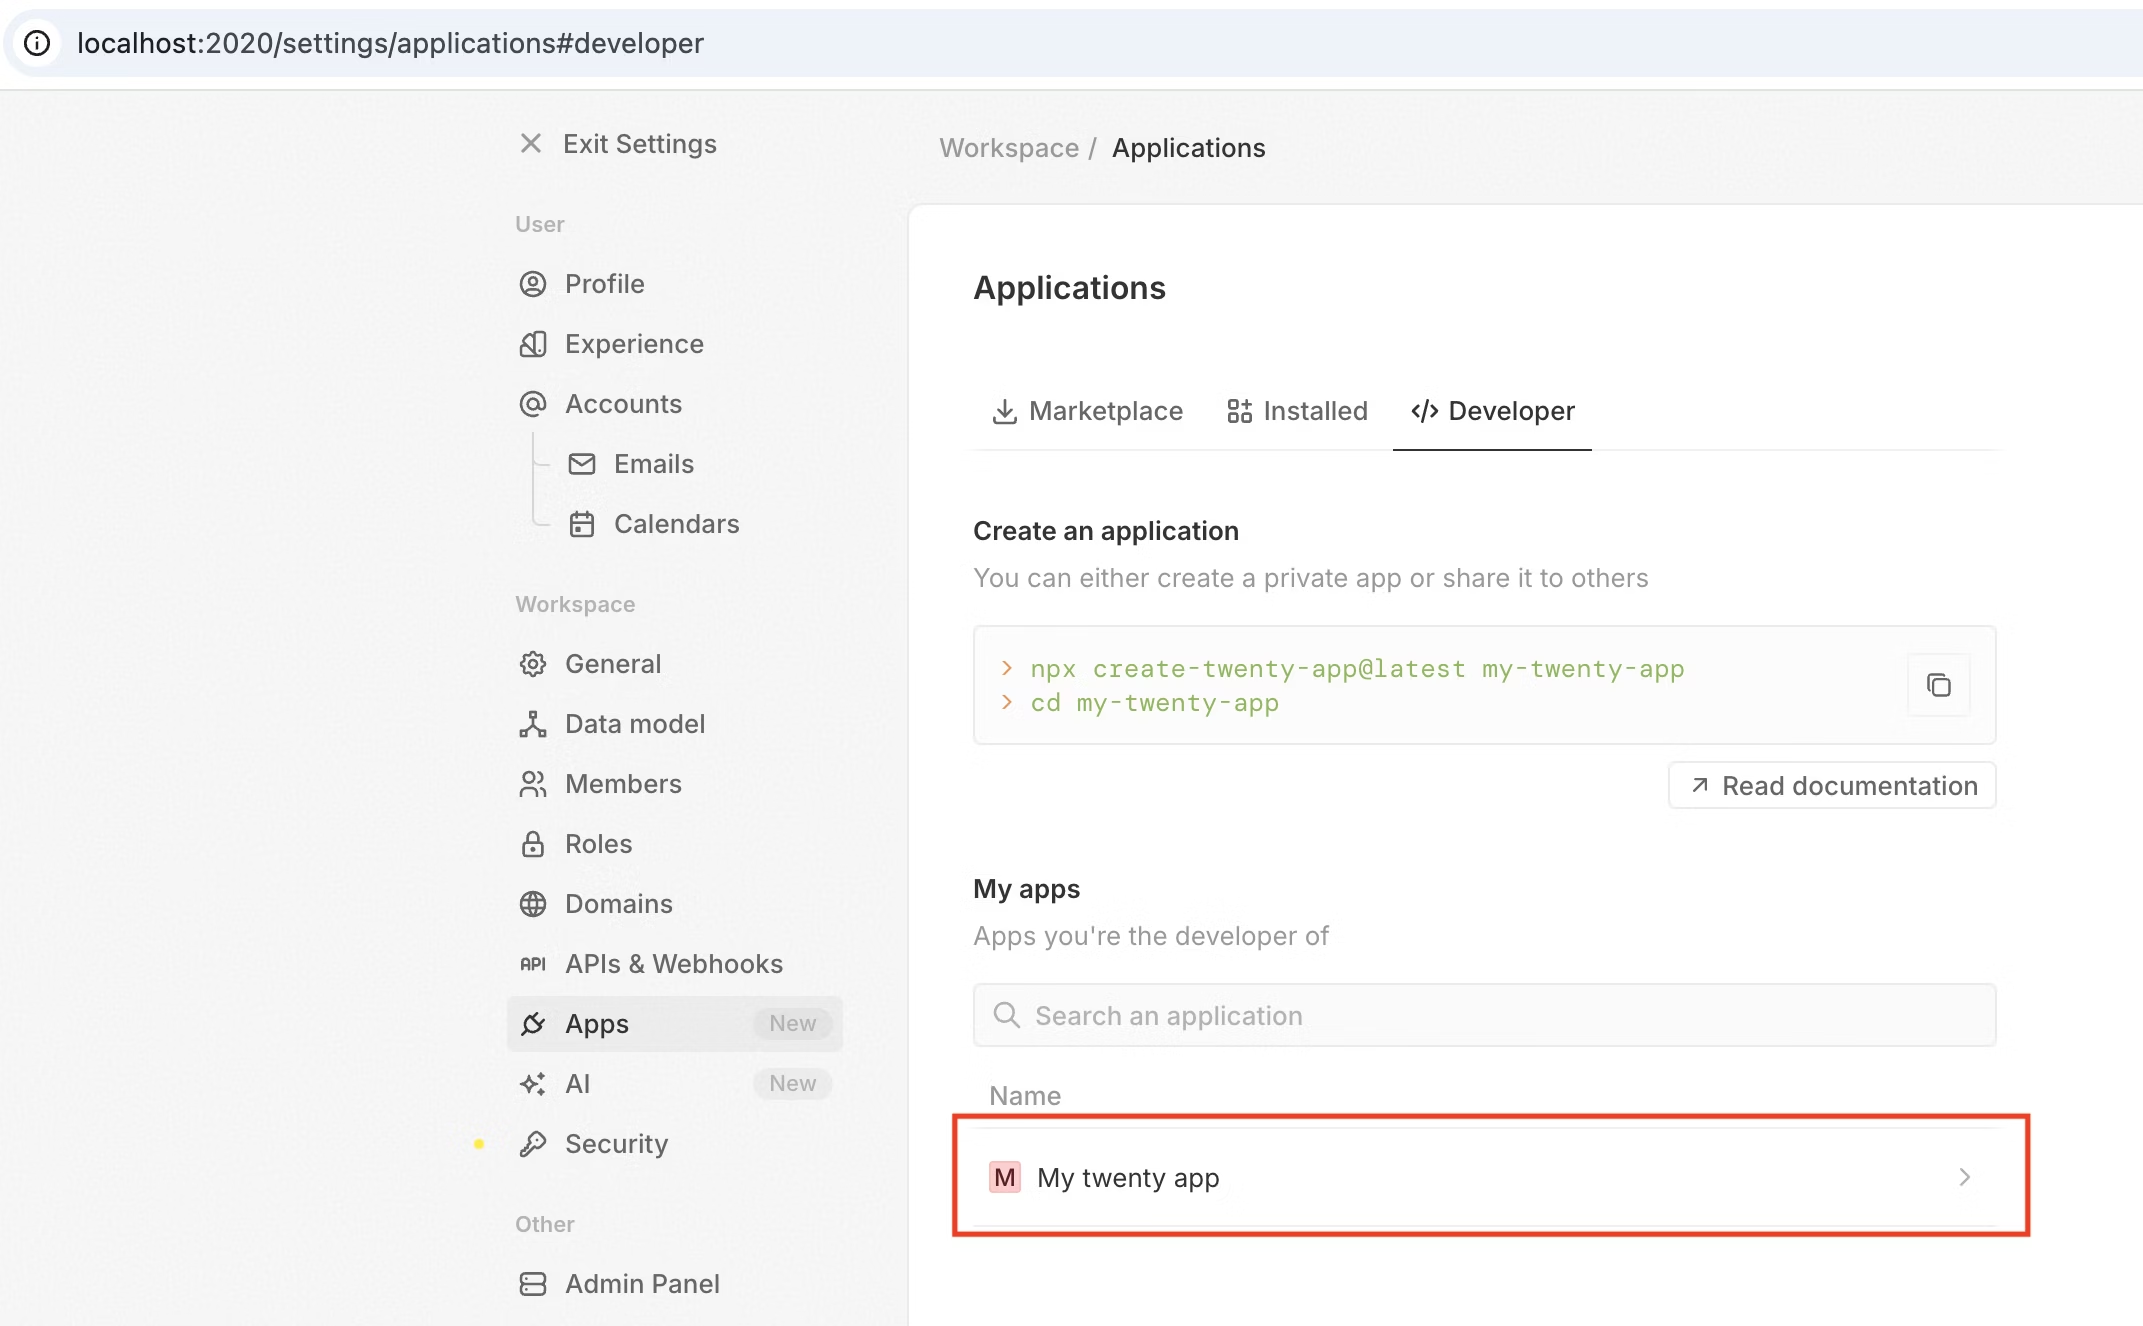
Open [http://localhost:2020/settings/applications#developer](http://localhost:2020/settings/applications#developer). You should see your app under **Your Apps**.
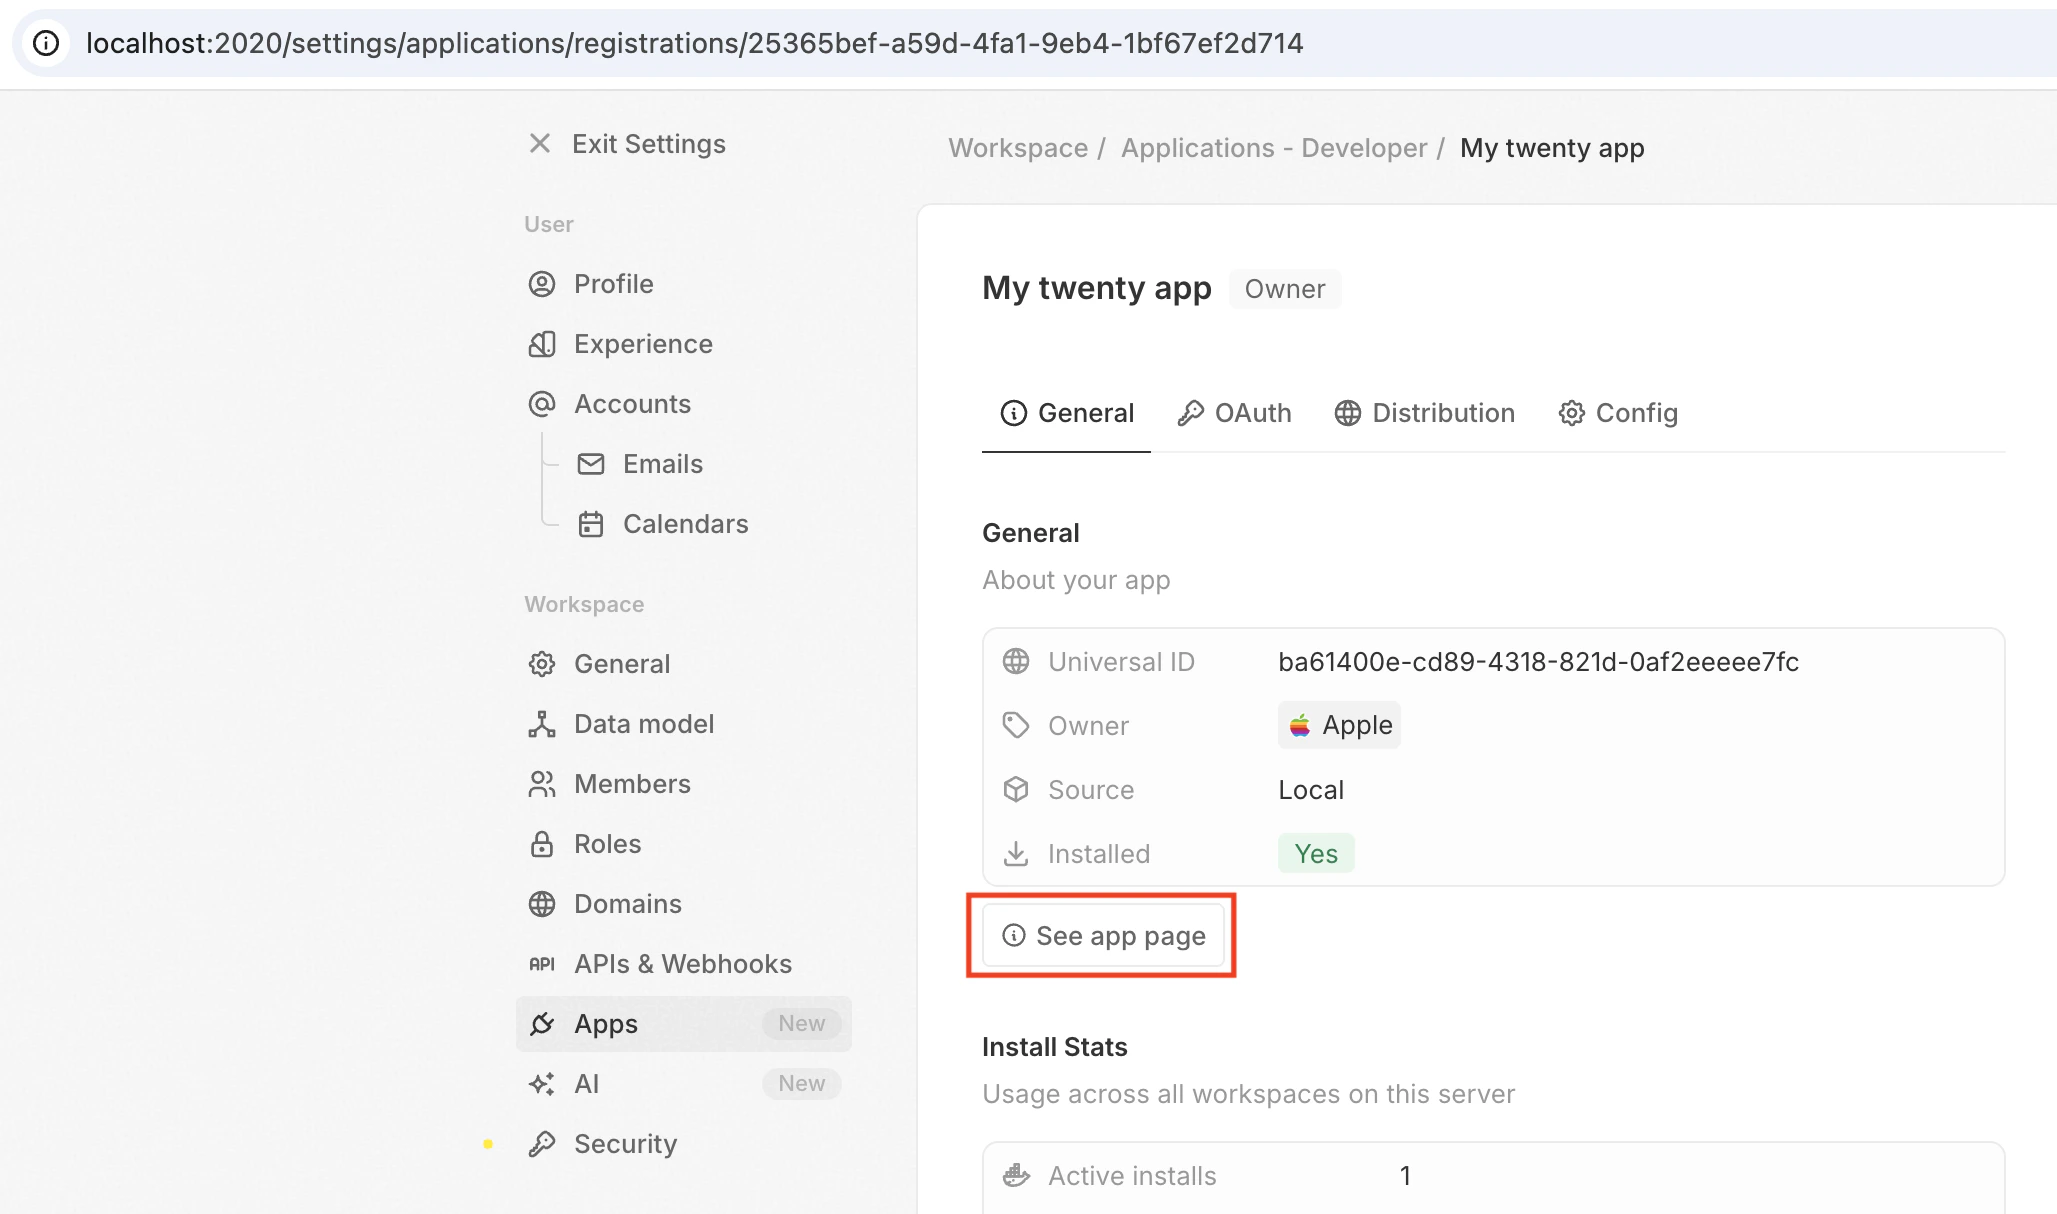
Click **My twenty app** to see its **application registration** — a server-level record describing your app (name, identifier, OAuth credentials, source). One registration can be installed across multiple workspaces on the same server.
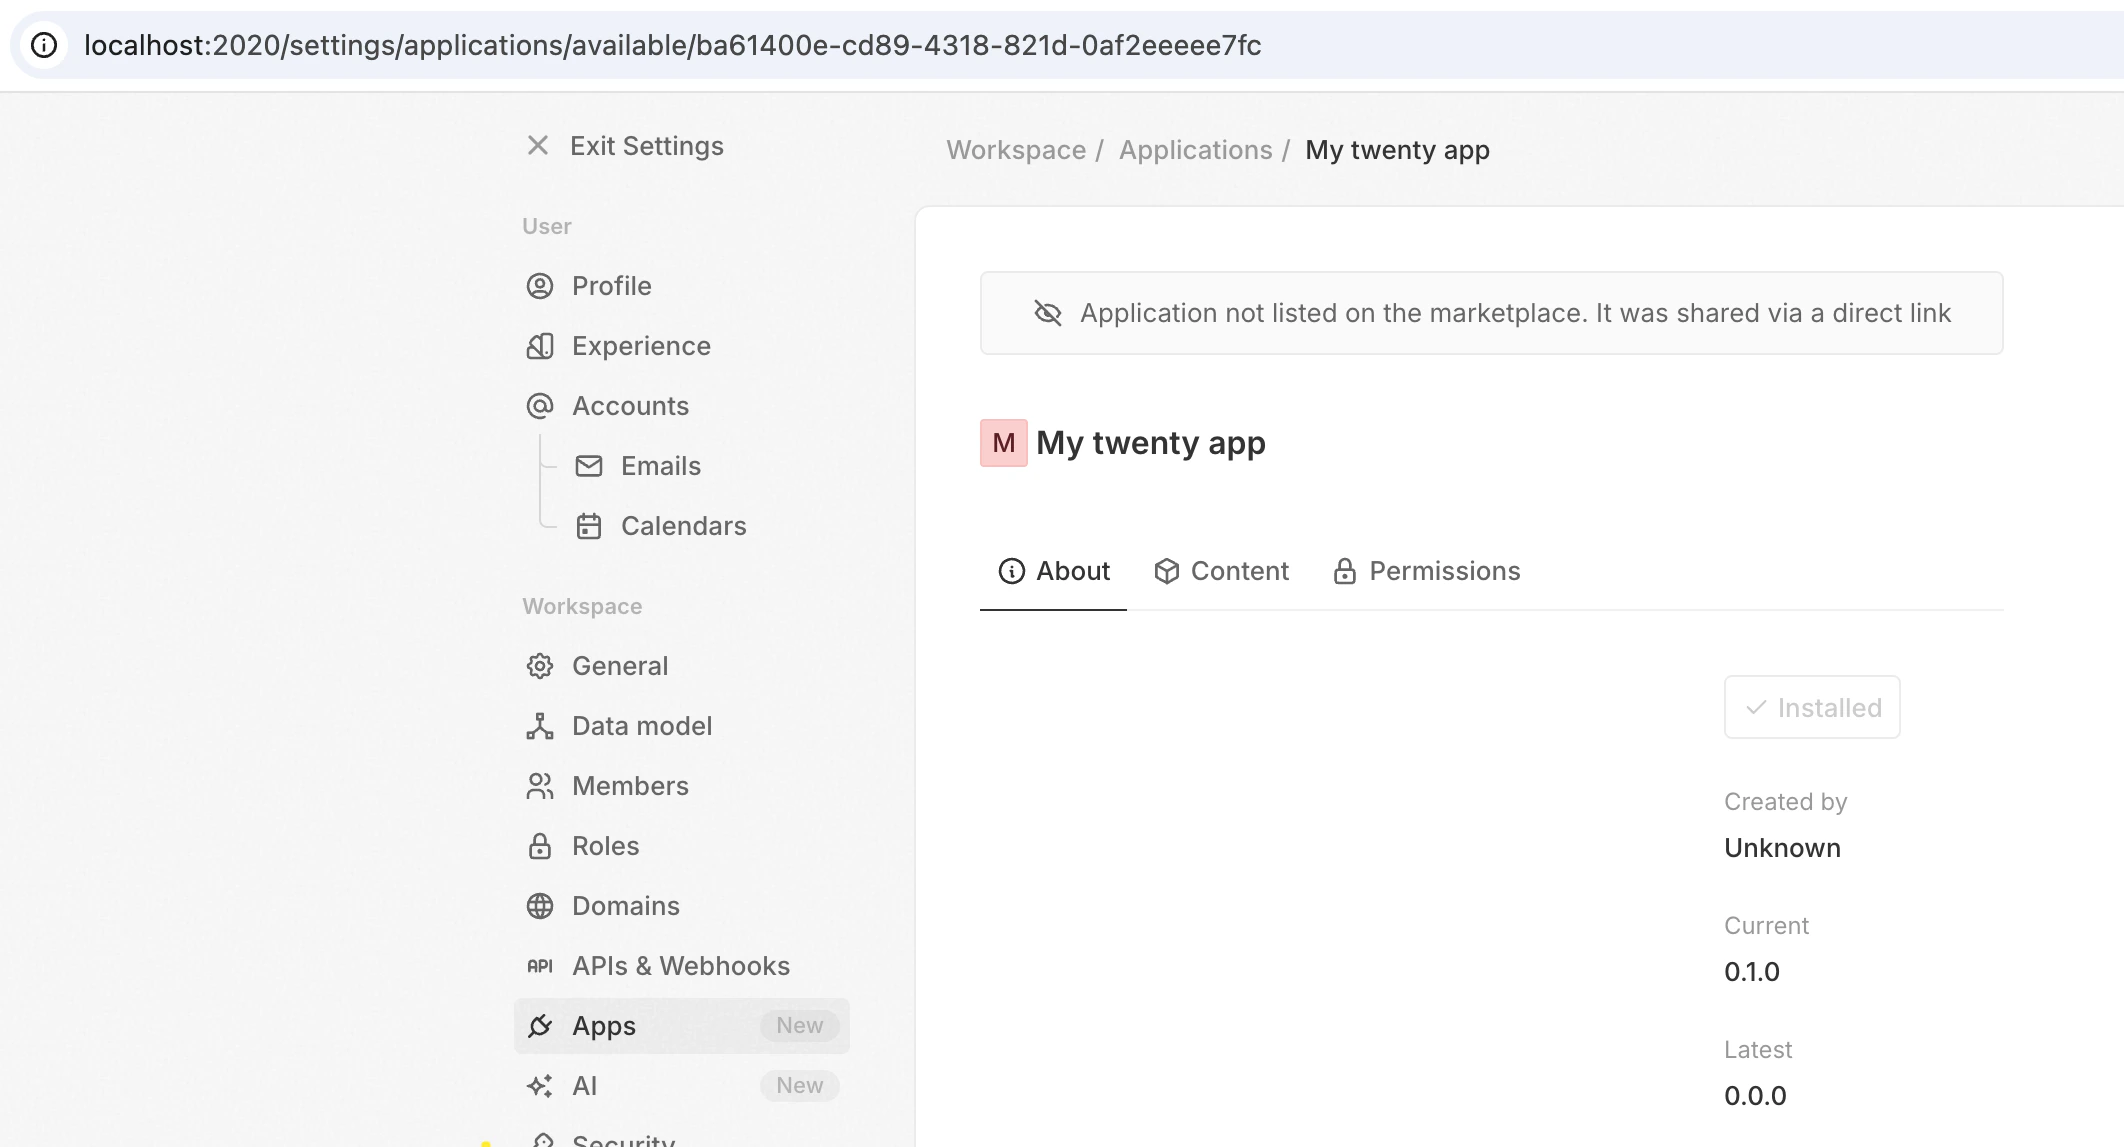
Click **View installed app** to see the workspace install. The **About** tab shows version and management options.
**After this phase:** you have a live development loop. Edit any file in `src/` and it appears in the UI.
### One-shot sync for CI and scripts
Pass `--once` to run a single build + sync and exit — same pipeline, no watcher:
```bash filename="Terminal" theme={null}
yarn twenty dev --once
```
| Command | Behavior | When to use |
| ---------------------------------- | ----------------------------------------------------------------- | ------------------------------------------------------------ |
| `yarn twenty dev` | Watches and re-syncs on every change. Runs until you stop it. | Interactive local development. |
| `yarn twenty dev --once` | Single build + sync, exits `0` on success, `1` on failure. | CI, pre-commit hooks, AI agents, scripted workflows. |
| `yarn twenty dev --once --dry-run` | Builds and prints the metadata changes **without applying them**. | Inspecting what a sync would change before committing to it. |
Both modes need an authenticated remote. See [Syncing & recovery](/developers/extend/apps/operations/sync-and-recovery#previewing-changes-dry-run) for more on `--dry-run`.
### Dev mode options
| Flag | Description |
| ----------------------- | ---------------------------------------------------------------------------------- |
| `--once` | Build and sync once, then exit. |
| `--dry-run` | With `--once`, preview the metadata changes without applying them. Writes nothing. |
| `--debounceMs ` | Set the file-change debounce delay in milliseconds (default: `2000`). |
| `--verbose` / `--debug` | Show detailed build logs, sync requests, and error traces. |
## What you can build
Apps are composed of **entities** — each defined as a TypeScript file with a single `export default`:
| Entity | What it does |
| ---------------------- | ----------------------------------------------------------------------------------- |
| **Objects & Fields** | Custom data models (Post Card, Invoice, etc.) with typed fields |
| **Logic functions** | Server-side TypeScript triggered by HTTP routes, cron schedules, or database events |
| **Front components** | React components that render inside Twenty's UI (side panel, widgets, command menu) |
| **Skills & Agents** | AI capabilities — reusable instructions and autonomous assistants |
| **Views & Navigation** | Pre-configured list views and sidebar menu items |
| **Page layouts** | Custom record detail pages with tabs and widgets |
Full reference: [Concepts](/developers/extend/apps/getting-started/concepts).
## Next steps
Application identity, default role, install hooks, public assets.
Objects, fields, and bidirectional relations.
Logic functions, skills, agents, and OAuth connections.
Views, navigation, page layouts, front components.
CLI, testing, remotes, CI, and publishing your app.