> ## Documentation Index
> Fetch the complete documentation index at: https://docs.twenty.com/llms.txt
> Use this file to discover all available pages before exploring further.
# Forward a Shared Inbox from Any Email Provider
> Point a shared inbox at a Twenty email channel, whatever mail provider you use.
Twenty receives shared inbox mail by having your provider send a copy of every incoming message to a private address that Twenty generates for you. Once that is in place, the inbox appears in your workspace.
Microsoft 365 and Google Workspace each have their own guide:
* [Microsoft 365](/user-guide/calendar-emails/how-tos/forward-a-shared-inbox-from-microsoft-365)
* [Google Workspace](/user-guide/calendar-emails/how-tos/forward-a-shared-inbox-from-google-workspace)
This page covers every other provider.
## Part 1: Create the channel in Twenty
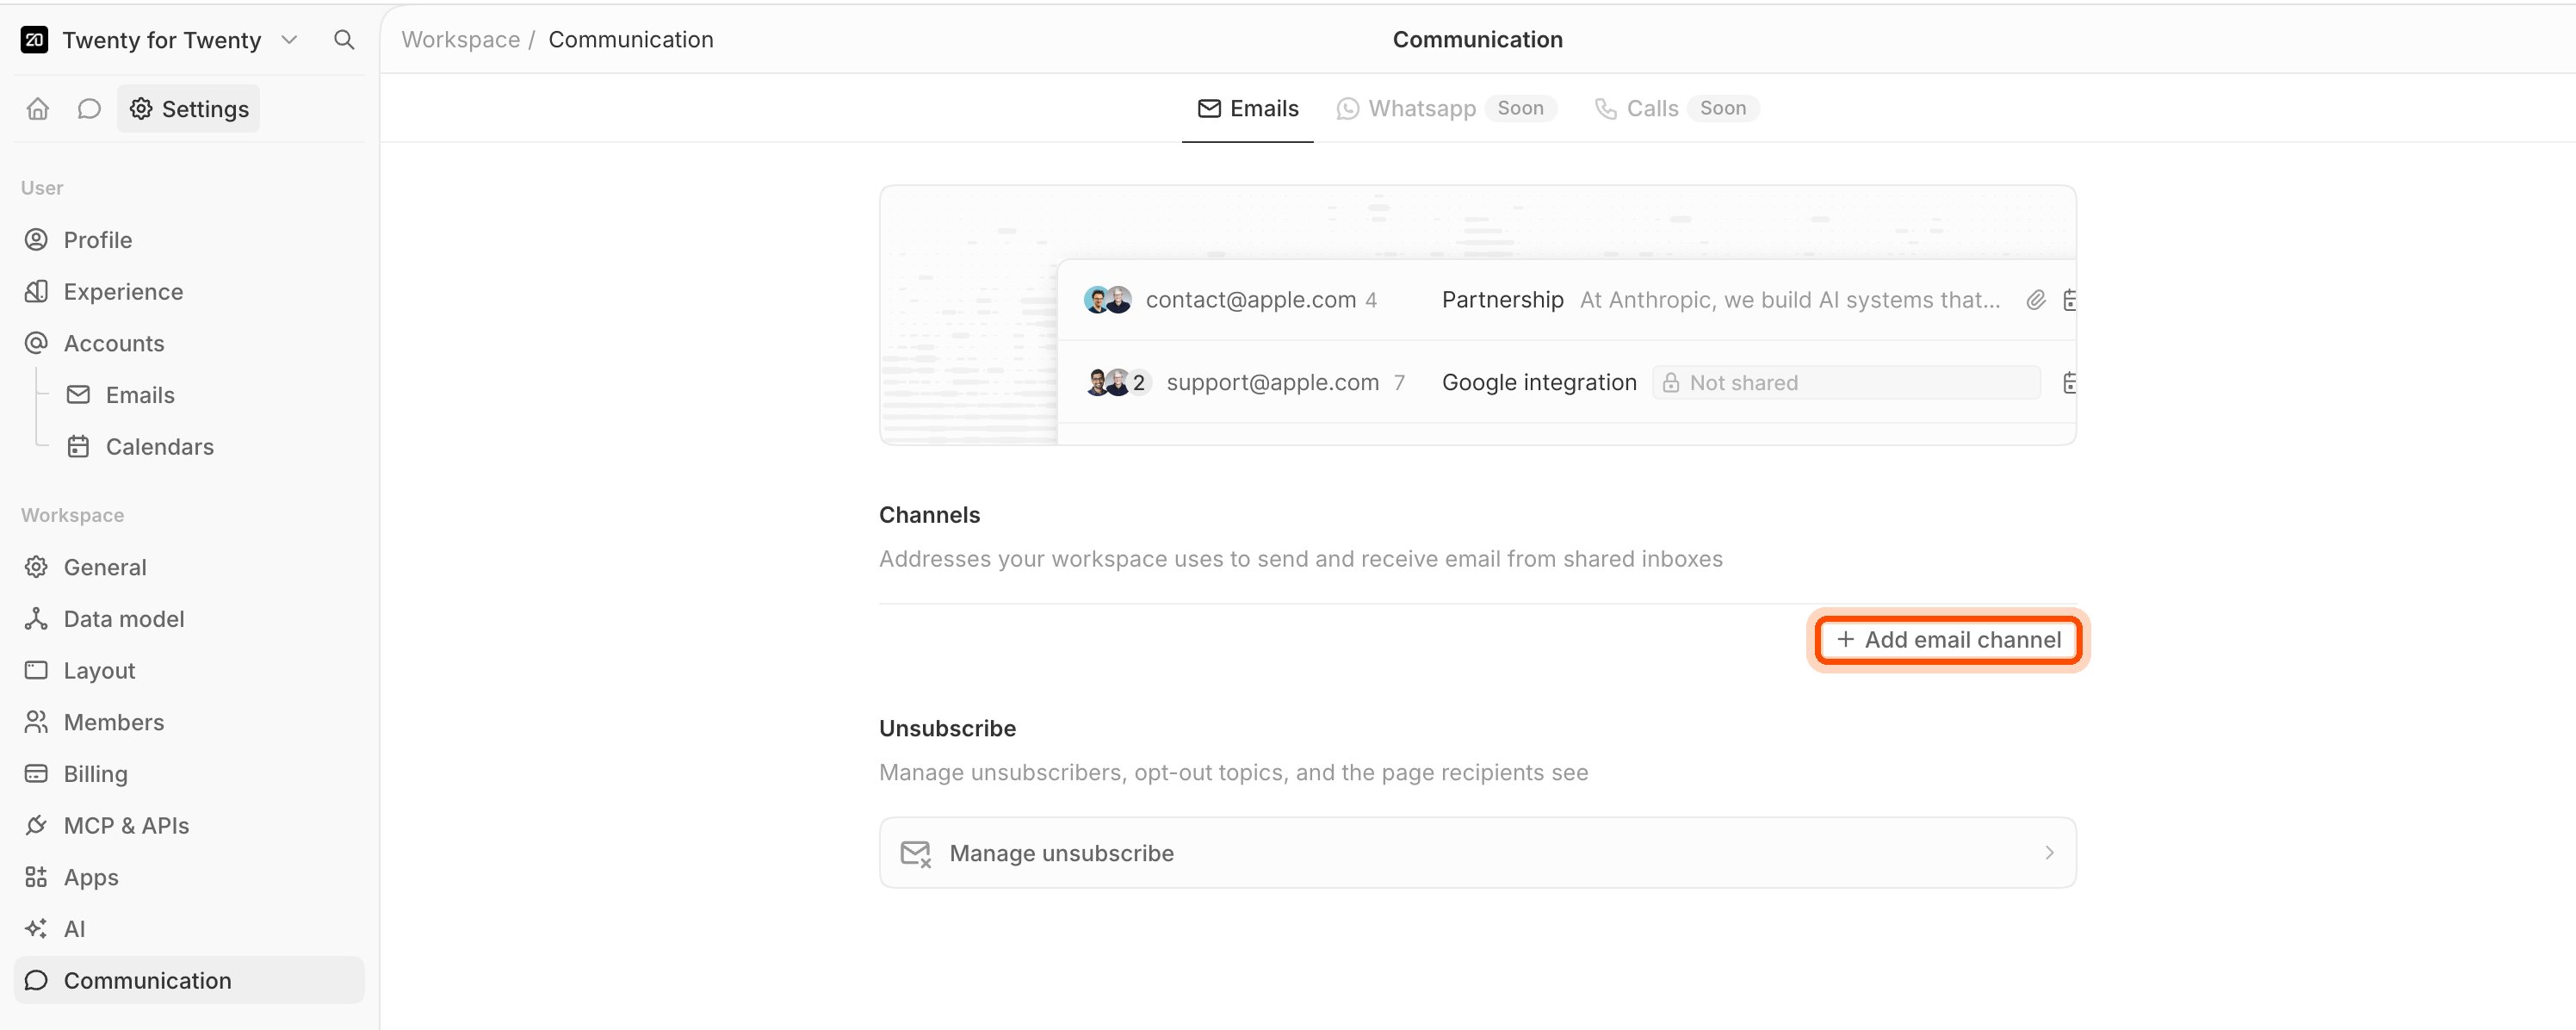
1. Go to **Settings → Communication**.
2. Click **Add email channel**.
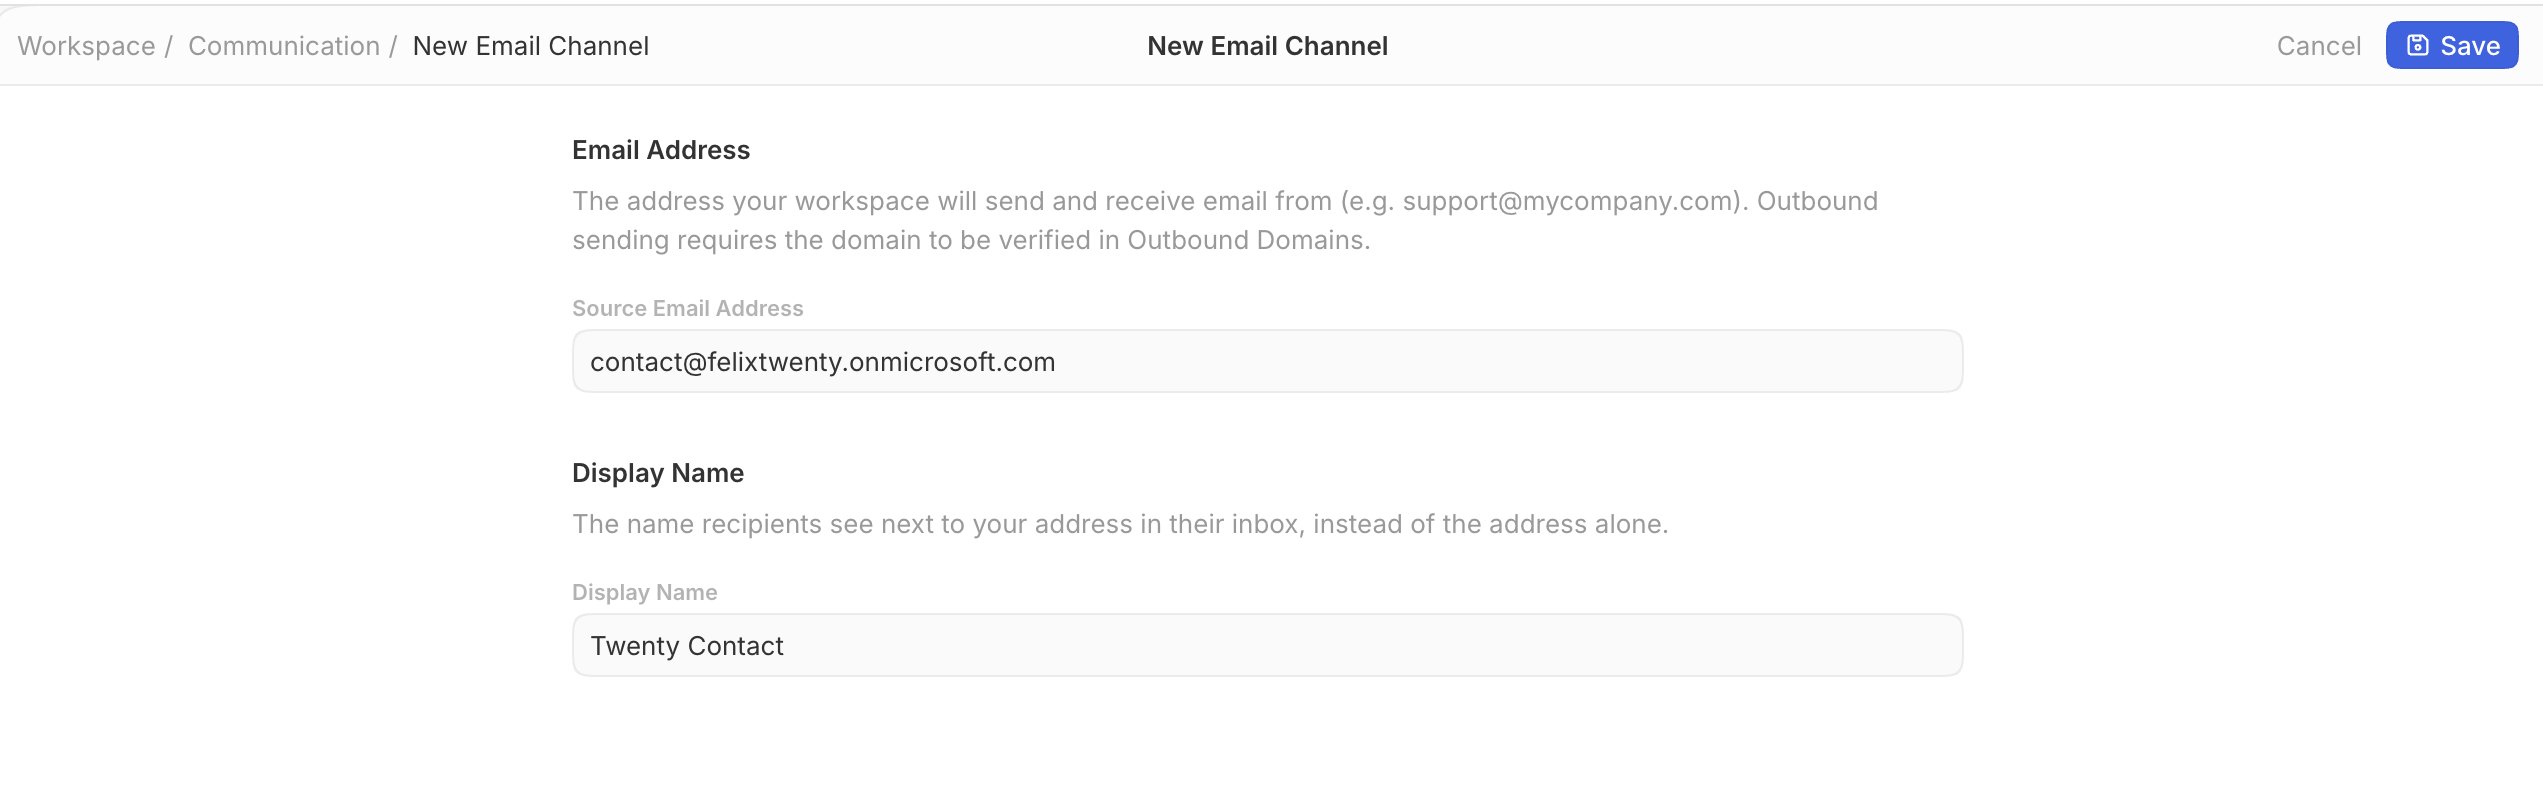
 3. In **Source Email Address**, type the shared address you want to receive mail at, for example `contact@yourcompany.com`.
4. In **Display Name**, type the name recipients see.
5. Click **Save**.
3. In **Source Email Address**, type the shared address you want to receive mail at, for example `contact@yourcompany.com`.
4. In **Display Name**, type the name recipients see.
5. Click **Save**.
 6. Twenty now shows a **Forwarding address**. It ends in `@inbound.twenty.com`. Click **Copy**.
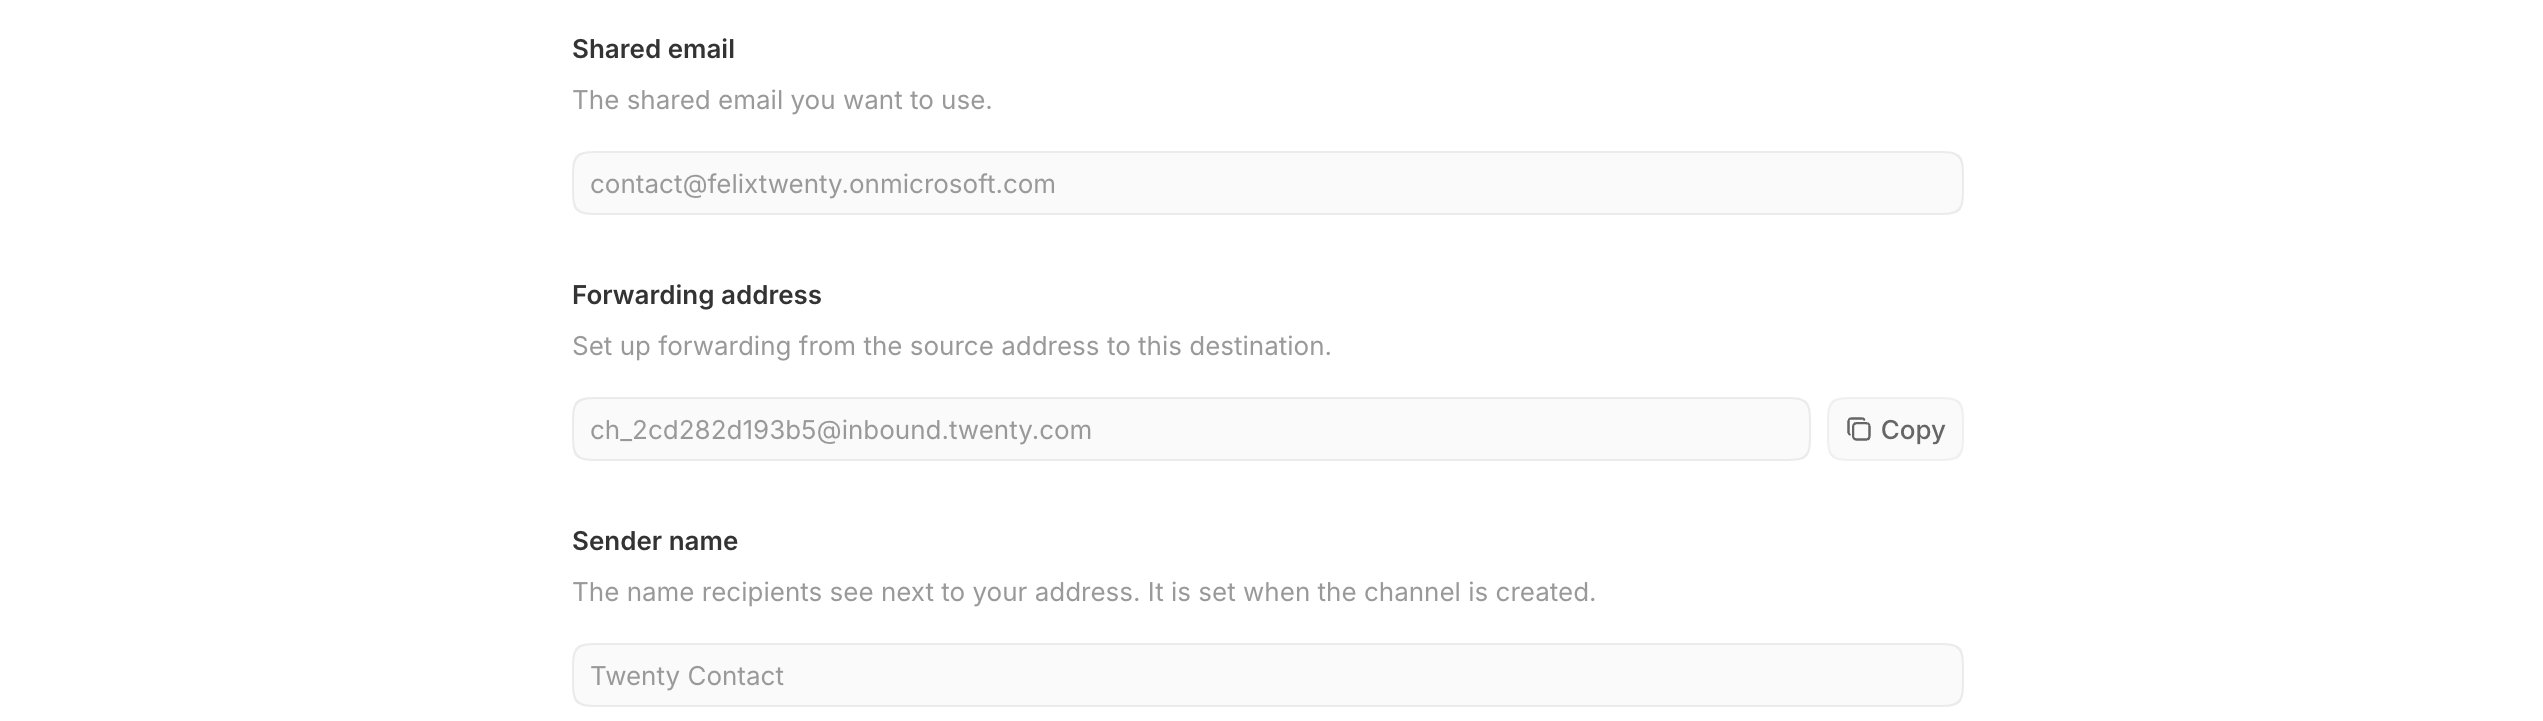 Each channel gets its own forwarding address. Never point two mailboxes at the
same one, or their mail will land in the same place.
## Part 2: Choose the right kind of forwarding
Most providers offer more than one way to pass mail on, and only one of them works here.
Twenty reads the `From` header of each message it receives to determine who wrote it. That is how a message is linked to the right person and company.
* **Automatic forwarding on the mail server** leaves the original sender in place. Your customer remains the sender, the message is linked to their record, and replies go back to them. Some providers call this **Redirect**, others call it **Forwarding**. This is the option to use.
* **Forwarding as an attachment**, or any rule that composes a new message, replaces the sender with your own address. Every conversation then appears to come from you, and no message is matched to a contact.
Use the automatic forwarding setting in your mail account or on your mail server. Do not use a rule that resends the message as a new email.
Also avoid rules that strip attachments or convert messages to plain text.
Twenty stores each message exactly as it arrives.
Where the option exists, choose the one that **keeps a copy** in the original mailbox, so your team can continue to use the inbox as before.
## Part 3: Find your provider
Follow your provider's instructions, using the forwarding address you copied in Part 1 as the destination.
| Provider | Their guide |
| ---------------------- | ------------------------------------------------------------------------------------------------------------------------------------------------------------ |
| Amazon SES | [Forward incoming email to an external destination](https://aws.amazon.com/blogs/messaging-and-targeting/forward-incoming-email-to-an-external-destination/) |
| Amazon WorkMail | [Email rules](https://docs.aws.amazon.com/workmail/latest/userguide/email-rules.html) |
| Bluehost | [Create account and domain forwarders](https://www.bluehost.com/help/article/create-account-and-domain-forwarders) |
| cPanel | [Forwarders](https://docs.cpanel.net/cpanel/email/forwarders/) |
| DreamHost | [Add a forward-only email address](https://help.dreamhost.com/hc/en-us/articles/215724207-Add-a-forward-only-email-address) |
| Exchange (self-hosted) | [Configure email forwarding for a mailbox](https://learn.microsoft.com/en-us/exchange/recipients/user-mailboxes/email-forwarding) |
| GoDaddy | [Forward incoming email to another address](https://www.godaddy.com/help/forward-incoming-email-to-another-email-address-32282) |
| iCloud Mail | [Forward email on iCloud.com](https://support.apple.com/en-us/102376) |
| Namecheap | [Set up free email forwarding](https://www.namecheap.com/support/knowledgebase/article.aspx/308/2214/how-to-set-up-free-email-forwarding) |
| OVHcloud | [Email redirection](https://help.ovhcloud.com/csm/en-emails-redirection) |
| Rackspace | [Set up Rackspace email forwarding](https://docs.rackspace.com/docs/set-up-rackspace-email-forwarding) |
| Zoho Mail | [Email forwarding](https://www.zoho.com/mail/help/email-forwarding.html) |
If your provider is not listed, you can still connect it. In almost every mail product the setting appears under a name such as **Forwarding**, **Redirect**, **Forwarders**, **Aliases**, **Rules** or **Filters**, in either the mailbox settings or the domain settings.
## Part 4: Test it
Send an email from an outside address (a personal Gmail works) to `contact@yourcompany.com`. It should appear in Twenty within a minute or two.
## Troubleshooting
Compare the forwarding address character for character with the one in Twenty.
A single wrong character means the mail goes nowhere and is silently dropped.
The rule is rebuilding the message rather than passing it along, so your
address ends up in the `From` header. Switch to your provider's plain
forwarding or redirect setting, and turn off any option that forwards as an
attachment.
Your provider blocks automatic forwarding to outside domains. Look for a
security or anti-spam setting that allows external forwarding, and enable it
for this mailbox only.
The rule moves messages on rather than copying them. Change it to keep a copy,
or add a second rule that delivers to the inbox.
Receiving and sending are separate. Sending requires your domain to be
verified under the channel's **Sending domain** section, which means adding
the DNS records Twenty lists there.
Each channel gets its own forwarding address. Never point two mailboxes at the
same one, or their mail will land in the same place.
## Part 2: Choose the right kind of forwarding
Most providers offer more than one way to pass mail on, and only one of them works here.
Twenty reads the `From` header of each message it receives to determine who wrote it. That is how a message is linked to the right person and company.
* **Automatic forwarding on the mail server** leaves the original sender in place. Your customer remains the sender, the message is linked to their record, and replies go back to them. Some providers call this **Redirect**, others call it **Forwarding**. This is the option to use.
* **Forwarding as an attachment**, or any rule that composes a new message, replaces the sender with your own address. Every conversation then appears to come from you, and no message is matched to a contact.
Use the automatic forwarding setting in your mail account or on your mail server. Do not use a rule that resends the message as a new email.
Also avoid rules that strip attachments or convert messages to plain text.
Twenty stores each message exactly as it arrives.
Where the option exists, choose the one that **keeps a copy** in the original mailbox, so your team can continue to use the inbox as before.
## Part 3: Find your provider
Follow your provider's instructions, using the forwarding address you copied in Part 1 as the destination.
| Provider | Their guide |
| ---------------------- | ------------------------------------------------------------------------------------------------------------------------------------------------------------ |
| Amazon SES | [Forward incoming email to an external destination](https://aws.amazon.com/blogs/messaging-and-targeting/forward-incoming-email-to-an-external-destination/) |
| Amazon WorkMail | [Email rules](https://docs.aws.amazon.com/workmail/latest/userguide/email-rules.html) |
| Bluehost | [Create account and domain forwarders](https://www.bluehost.com/help/article/create-account-and-domain-forwarders) |
| cPanel | [Forwarders](https://docs.cpanel.net/cpanel/email/forwarders/) |
| DreamHost | [Add a forward-only email address](https://help.dreamhost.com/hc/en-us/articles/215724207-Add-a-forward-only-email-address) |
| Exchange (self-hosted) | [Configure email forwarding for a mailbox](https://learn.microsoft.com/en-us/exchange/recipients/user-mailboxes/email-forwarding) |
| GoDaddy | [Forward incoming email to another address](https://www.godaddy.com/help/forward-incoming-email-to-another-email-address-32282) |
| iCloud Mail | [Forward email on iCloud.com](https://support.apple.com/en-us/102376) |
| Namecheap | [Set up free email forwarding](https://www.namecheap.com/support/knowledgebase/article.aspx/308/2214/how-to-set-up-free-email-forwarding) |
| OVHcloud | [Email redirection](https://help.ovhcloud.com/csm/en-emails-redirection) |
| Rackspace | [Set up Rackspace email forwarding](https://docs.rackspace.com/docs/set-up-rackspace-email-forwarding) |
| Zoho Mail | [Email forwarding](https://www.zoho.com/mail/help/email-forwarding.html) |
If your provider is not listed, you can still connect it. In almost every mail product the setting appears under a name such as **Forwarding**, **Redirect**, **Forwarders**, **Aliases**, **Rules** or **Filters**, in either the mailbox settings or the domain settings.
## Part 4: Test it
Send an email from an outside address (a personal Gmail works) to `contact@yourcompany.com`. It should appear in Twenty within a minute or two.
## Troubleshooting
Compare the forwarding address character for character with the one in Twenty.
A single wrong character means the mail goes nowhere and is silently dropped.
The rule is rebuilding the message rather than passing it along, so your
address ends up in the `From` header. Switch to your provider's plain
forwarding or redirect setting, and turn off any option that forwards as an
attachment.
Your provider blocks automatic forwarding to outside domains. Look for a
security or anti-spam setting that allows external forwarding, and enable it
for this mailbox only.
The rule moves messages on rather than copying them. Change it to keep a copy,
or add a second rule that delivers to the inbox.
Receiving and sending are separate. Sending requires your domain to be
verified under the channel's **Sending domain** section, which means adding
the DNS records Twenty lists there.