> ## Documentation Index
> Fetch the complete documentation index at: https://docs.twenty.com/llms.txt
> Use this file to discover all available pages before exploring further.
# Forward a Shared Inbox from Google Workspace
> Send mail from a Google Group into a Twenty email channel.
An email channel gives your workspace a shared address, like `sales@yourcompany.com`. Mail sent to that address has to reach Twenty somehow.
On Google Workspace that address is almost always a **Google Group**. You connect it by adding Twenty's private forwarding address as a member of the group. Every message the group receives is then copied to Twenty, and your team continues to receive it as before.
This applies to new mail only. Twenty will not see messages the group received
before you set this up.
## Before you start
You need two things:
* **Access**: you must own the group, or be a Super Admin or Groups Admin in Google Workspace.
* **A group that accepts outside addresses**: Twenty's forwarding address is external, so the group has to accept external members and accept mail from outside your company. Part 2 covers both.
## Part 1: Create the channel in Twenty
1. Go to **Settings → Communication**.
2. Click **Add email channel**.
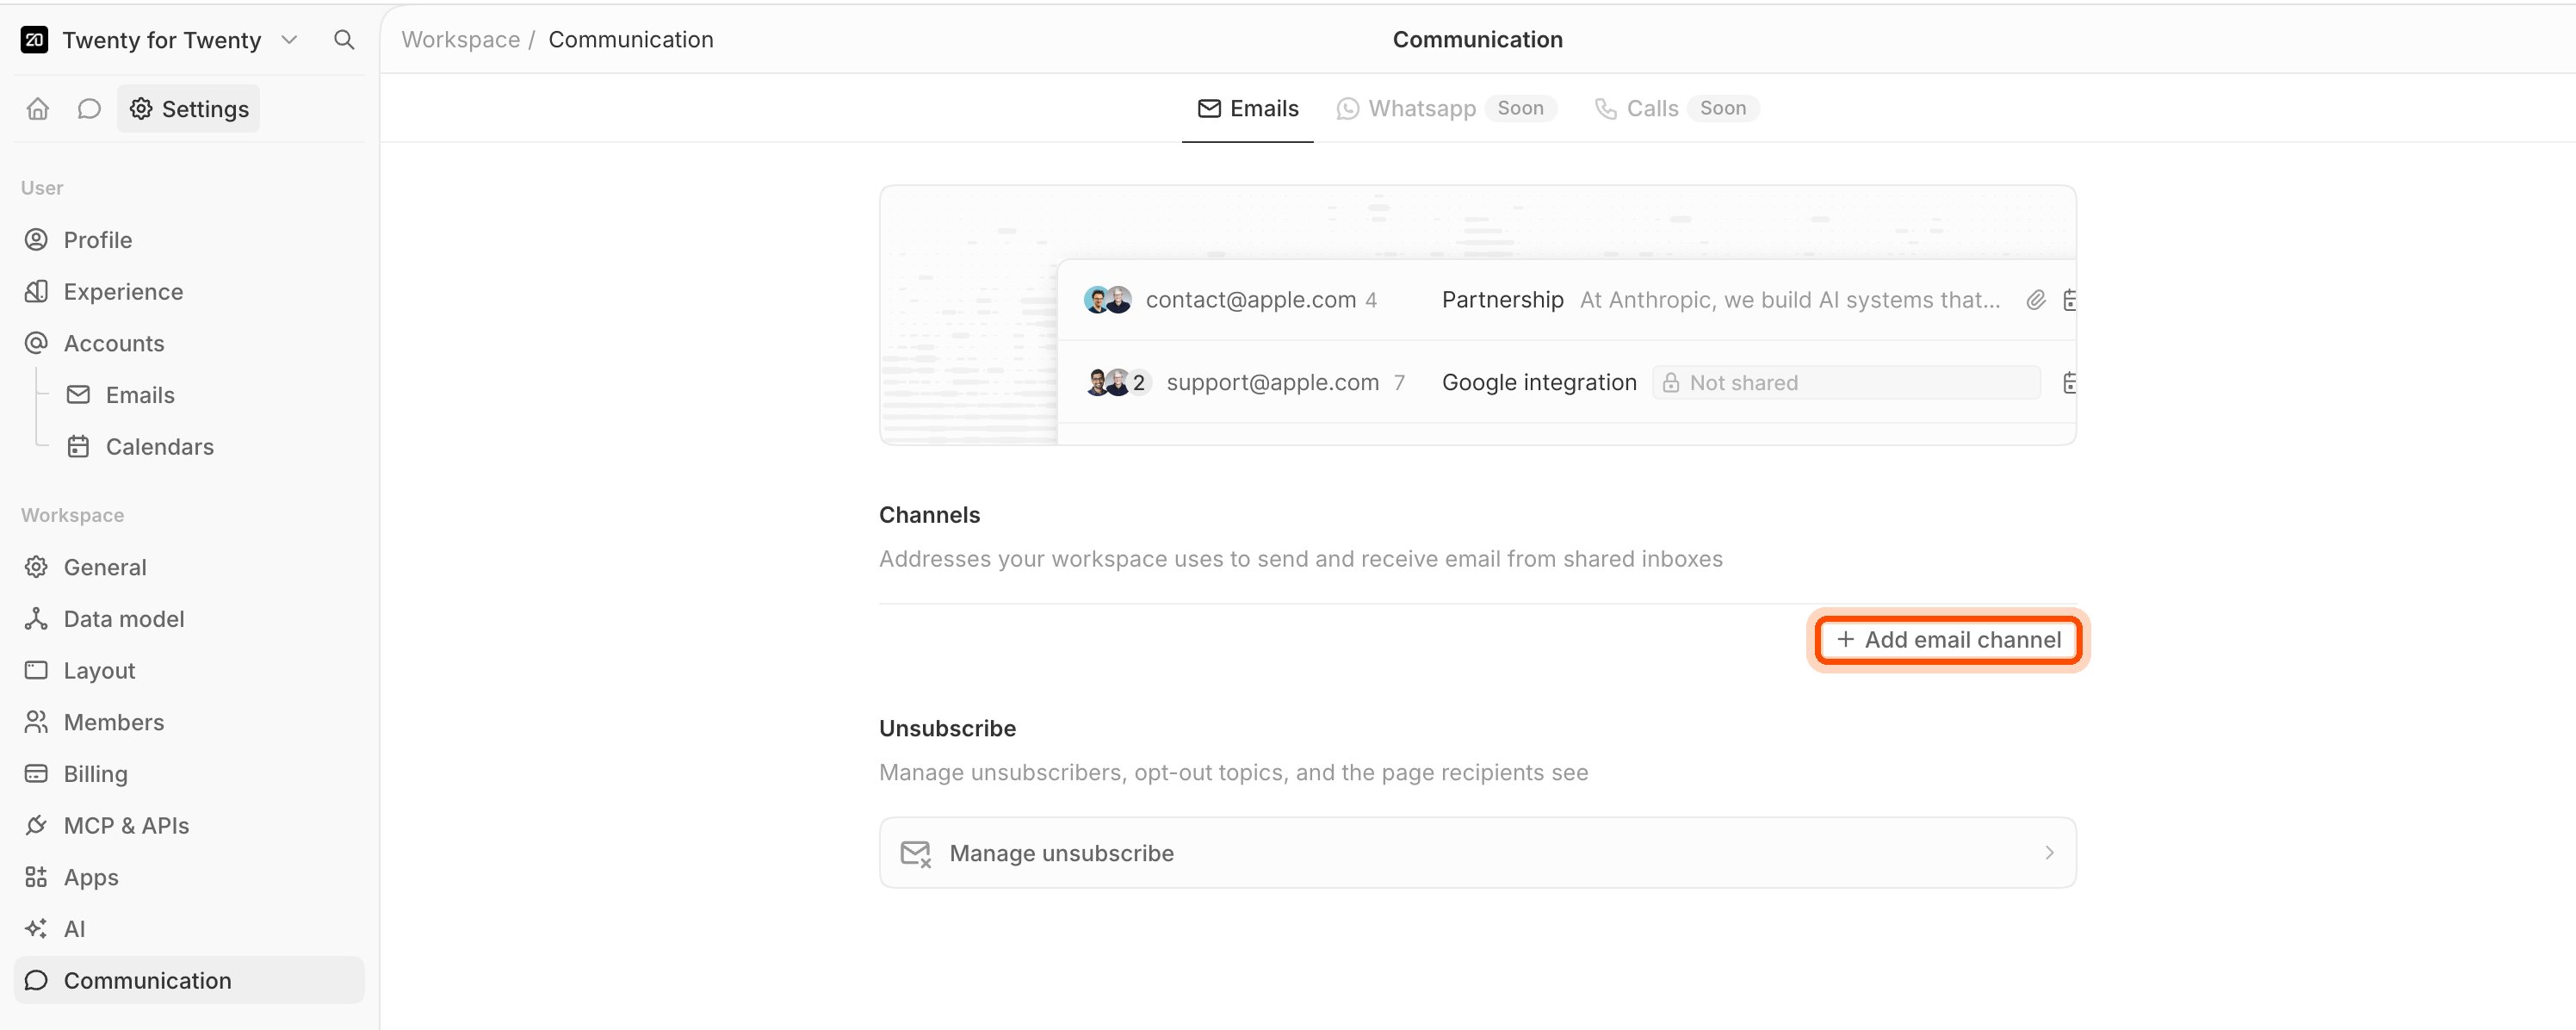 3. In **Source Email Address**, type the group address, for example `sales@yourcompany.com`.
4. In **Display Name**, type the name recipients see.
5. Click **Save**.
3. In **Source Email Address**, type the group address, for example `sales@yourcompany.com`.
4. In **Display Name**, type the name recipients see.
5. Click **Save**.
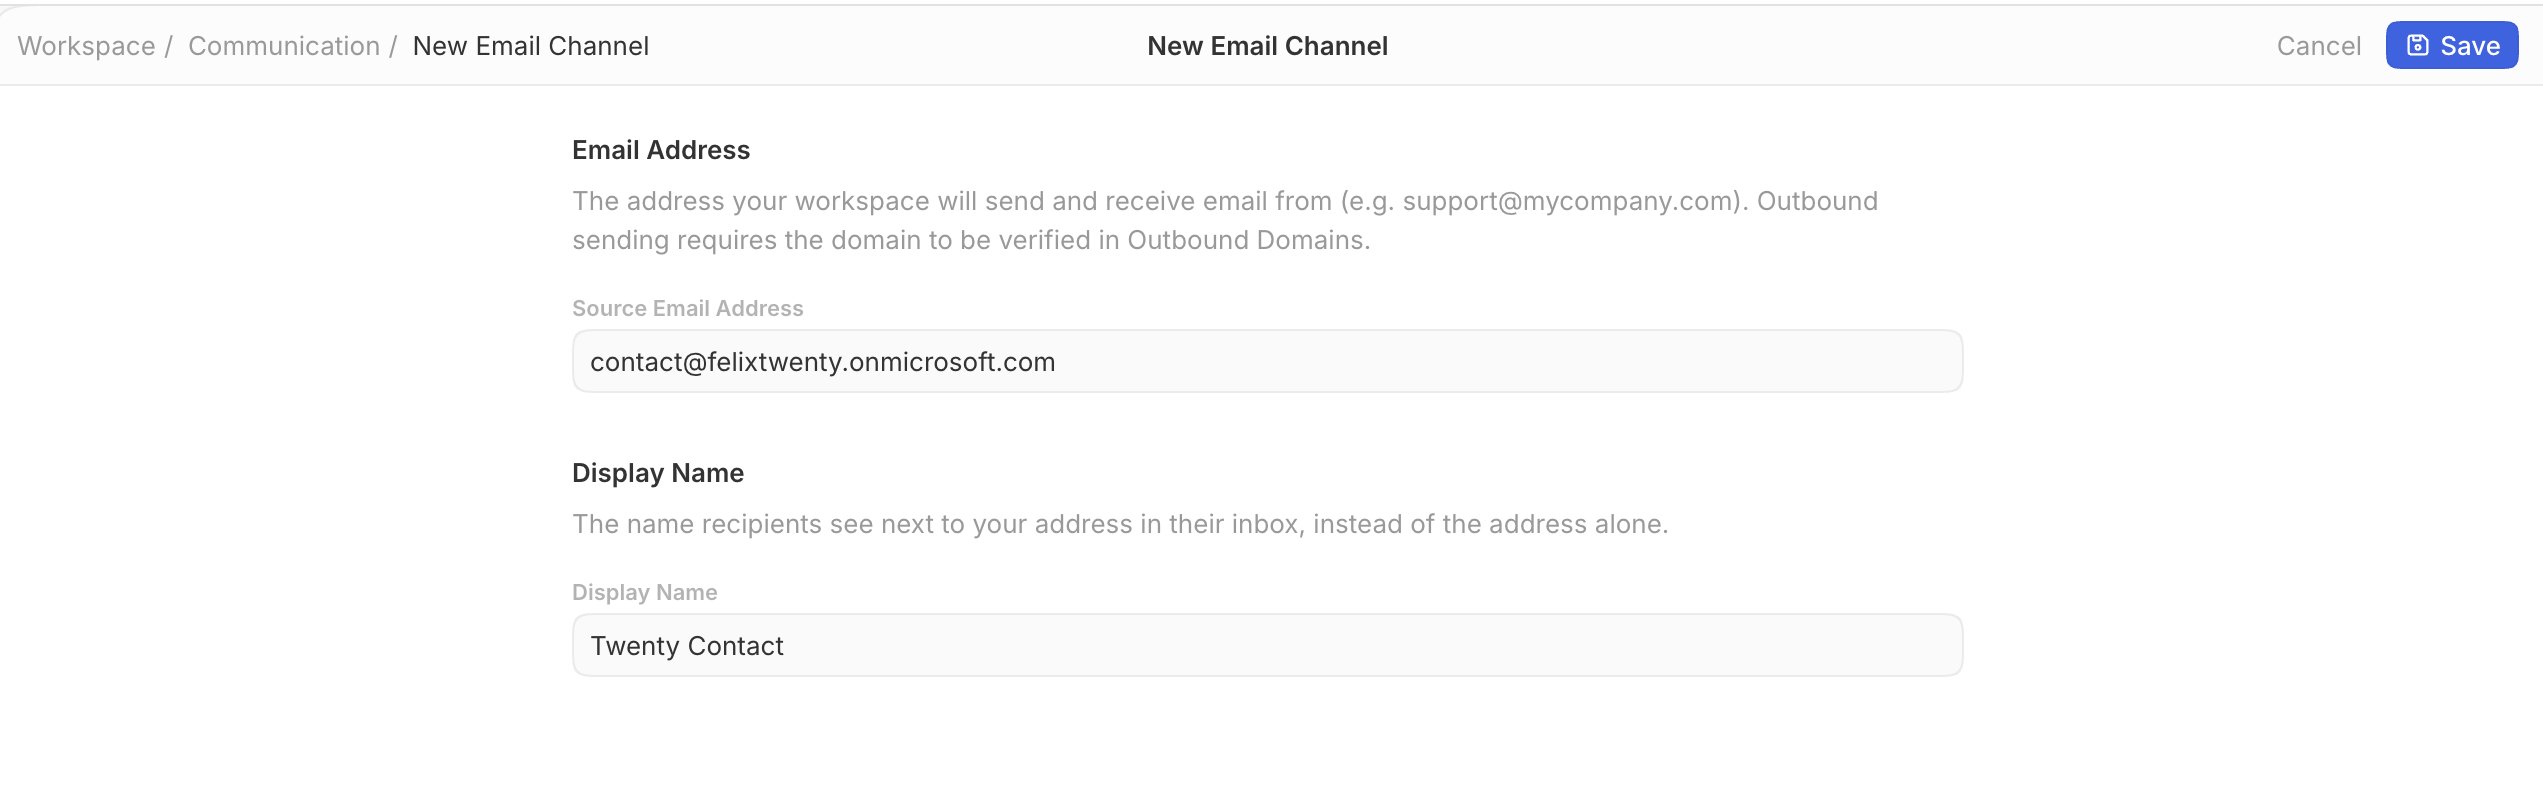 6. Twenty now shows a **Forwarding address**. It looks like `ch_2cd282d193b5@inbound.twenty.com`. Click **Copy**.
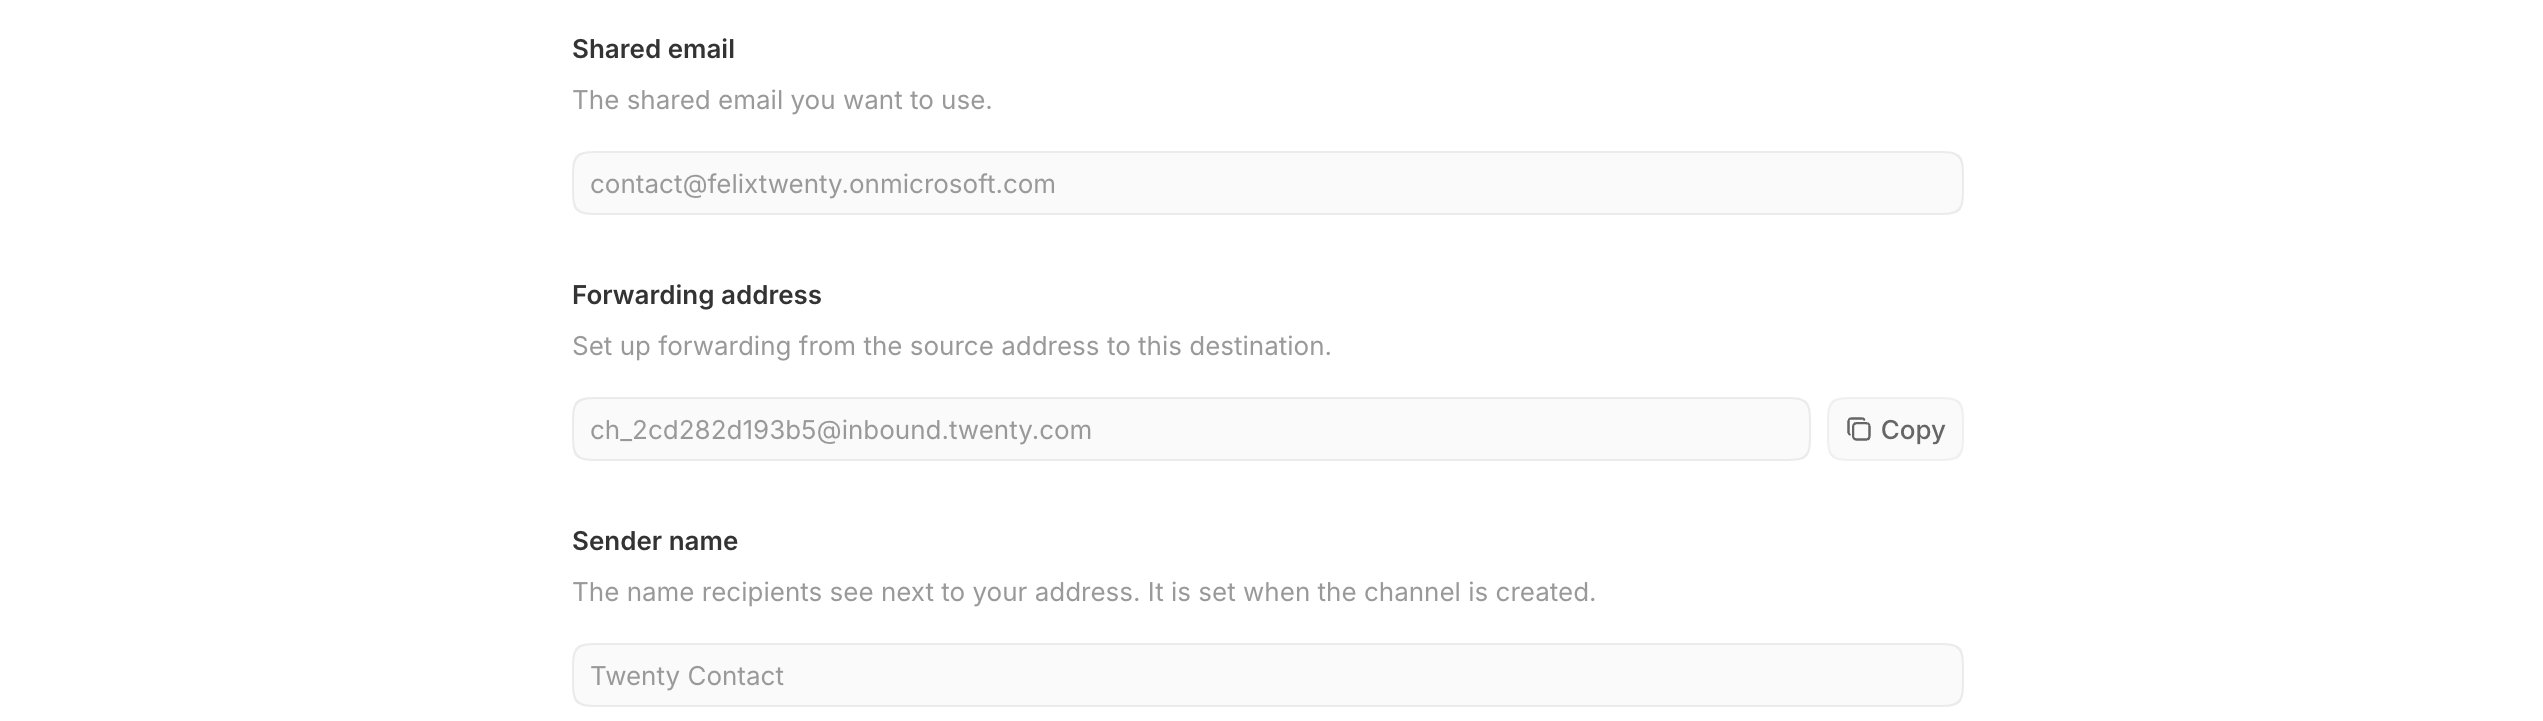 Each channel gets its own forwarding address. Never point two groups at the
same one, or their mail will land in the same place.
## Part 2: Check the group's settings
Two settings decide whether this works at all. Set them correctly before you continue.
1. Open [Google Groups](https://groups.google.com) and click your group.
2. Click **Group settings** in the left sidebar.
3. Find **External members** and turn **Allow external members** on.
Each channel gets its own forwarding address. Never point two groups at the
same one, or their mail will land in the same place.
## Part 2: Check the group's settings
Two settings decide whether this works at all. Set them correctly before you continue.
1. Open [Google Groups](https://groups.google.com) and click your group.
2. Click **Group settings** in the left sidebar.
3. Find **External members** and turn **Allow external members** on.
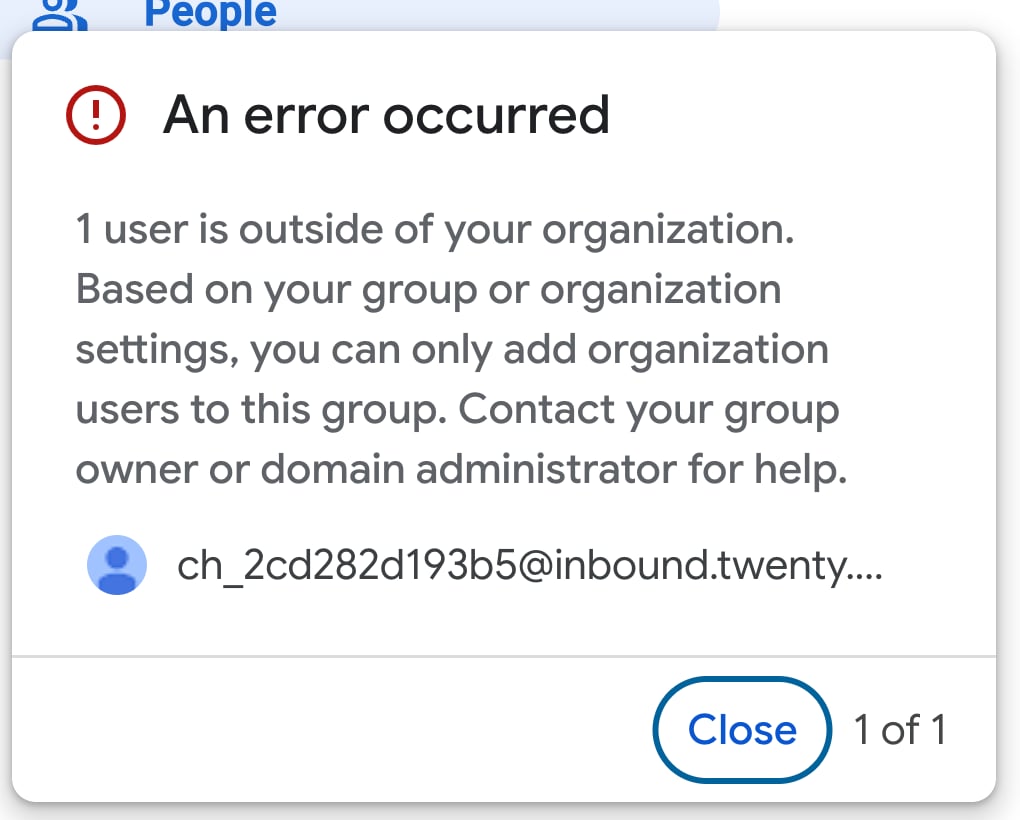
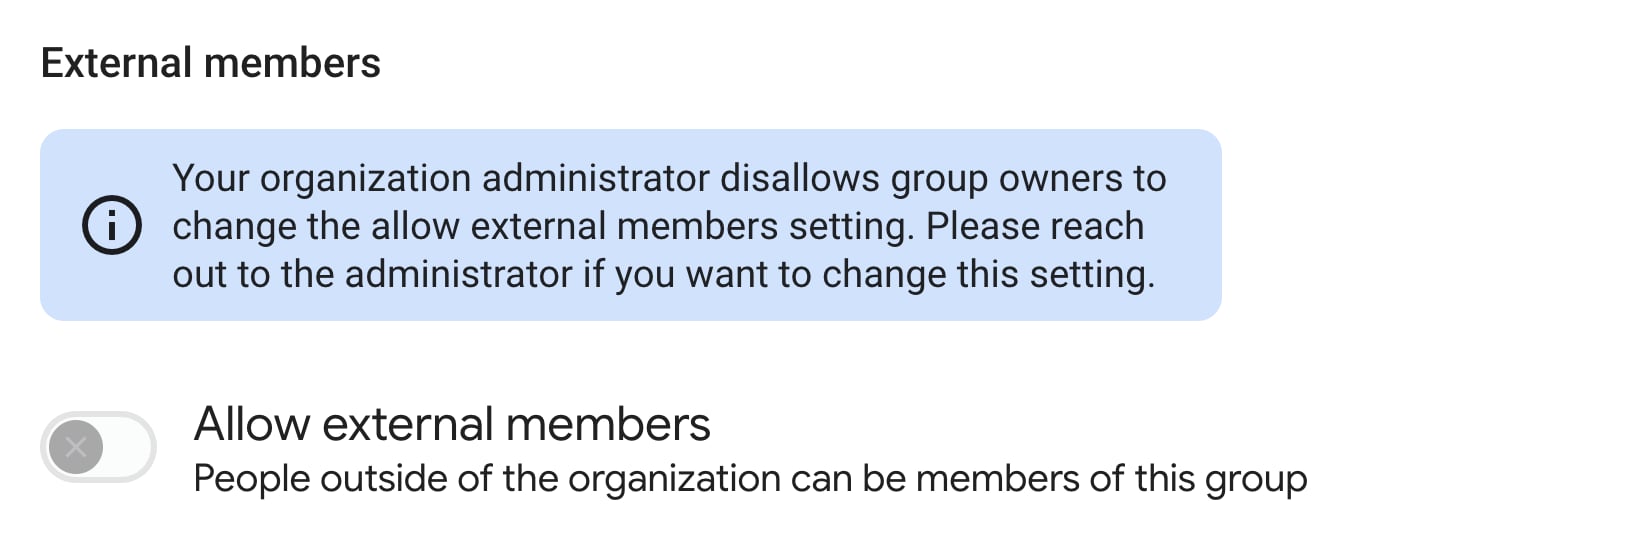 Google turns this off for the whole organization by default, so expect it to be locked the first time. If you see the notice shown above, only a Workspace admin can unlock it, by allowing group owners to add external members across the organization. Ask them, then return here.
4. Scroll down to **Who can post** and drag the slider all the way to the right, onto the globe. That is **Anyone on the web**.
Google turns this off for the whole organization by default, so expect it to be locked the first time. If you see the notice shown above, only a Workspace admin can unlock it, by allowing group owners to add external members across the organization. Ask them, then return here.
4. Scroll down to **Who can post** and drag the slider all the way to the right, onto the globe. That is **Anyone on the web**.
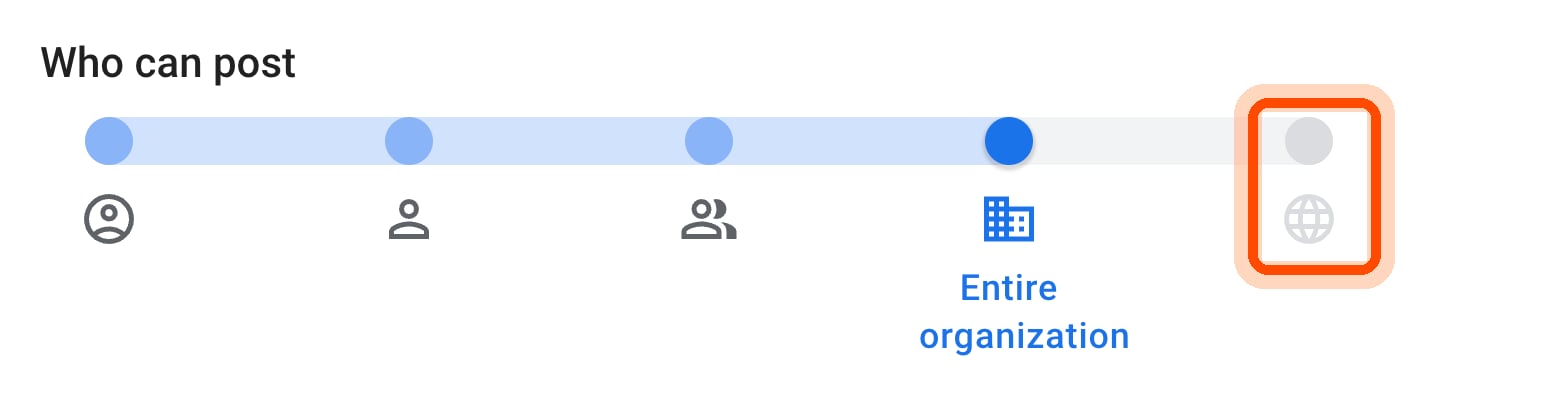 Without this, mail from outside your company never reaches the group, so it never reaches Twenty either. This is also blocked across the organization by default, and again only an admin can change it.
5. Click **Save changes**.
If the group carries Google's **Security** label, stop here. Google does not
allow non-Google accounts in a security group, and the label is permanent once
applied. Create a new group without it.
## Part 3: Add Twenty to the group
1. Click **Members** in the left sidebar.
2. Click **Add members**.
Without this, mail from outside your company never reaches the group, so it never reaches Twenty either. This is also blocked across the organization by default, and again only an admin can change it.
5. Click **Save changes**.
If the group carries Google's **Security** label, stop here. Google does not
allow non-Google accounts in a security group, and the label is permanent once
applied. Create a new group without it.
## Part 3: Add Twenty to the group
1. Click **Members** in the left sidebar.
2. Click **Add members**.
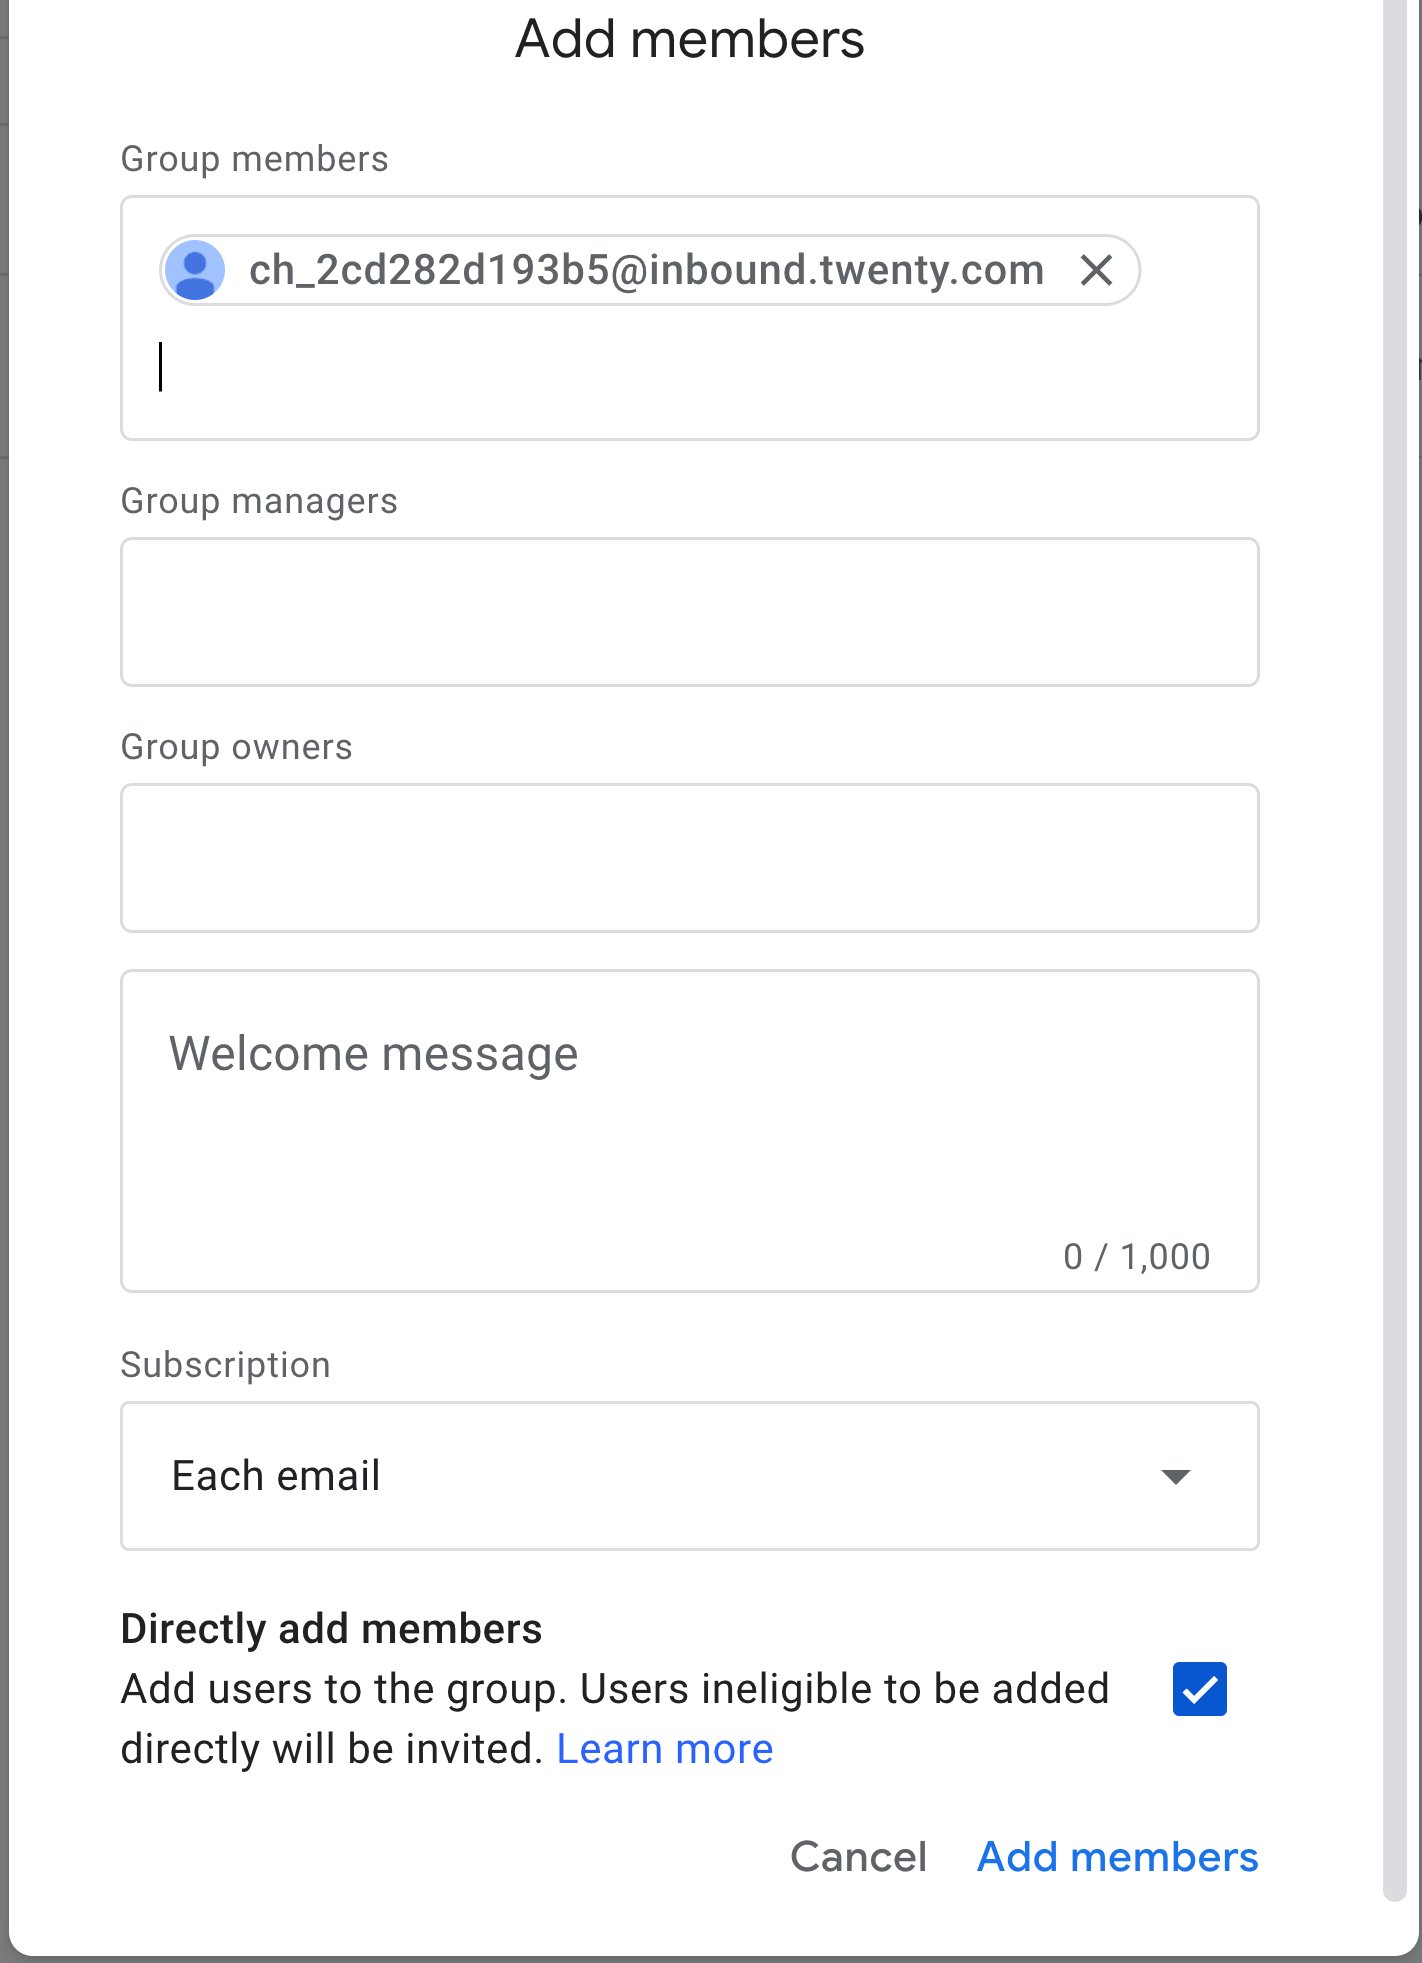
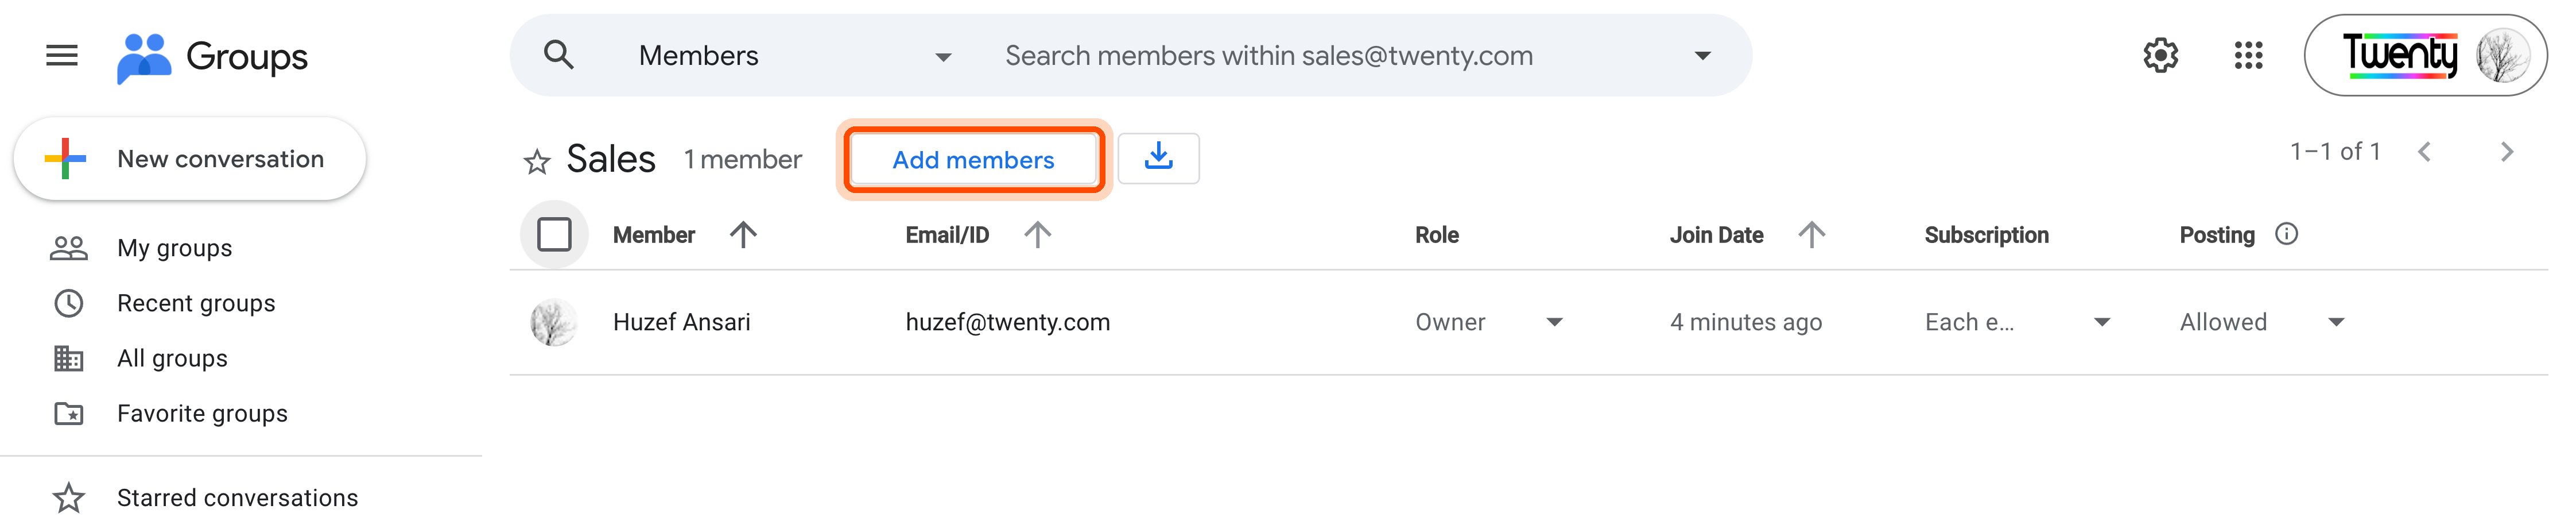 3. Paste the forwarding address you copied from Twenty into **Group members**.
4. Leave **Subscription** on **Each email**. This is what makes Google send every message through.
5. Leave **Directly add members** ticked, so Google adds the address rather than sending an invitation that cannot be accepted.
6. Click **Add members**.
3. Paste the forwarding address you copied from Twenty into **Group members**.
4. Leave **Subscription** on **Each email**. This is what makes Google send every message through.
5. Leave **Directly add members** ticked, so Google adds the address rather than sending an invitation that cannot be accepted.
6. Click **Add members**.
 That completes the setup. Twenty is now a member of the group like any other.
## If you do not have a group yet
1. In [Google Groups](https://groups.google.com), click **Create group**.
2. Fill in the **Group name** and the **Group email** prefix.
That completes the setup. Twenty is now a member of the group like any other.
## If you do not have a group yet
1. In [Google Groups](https://groups.google.com), click **Create group**.
2. Fill in the **Group name** and the **Group email** prefix.
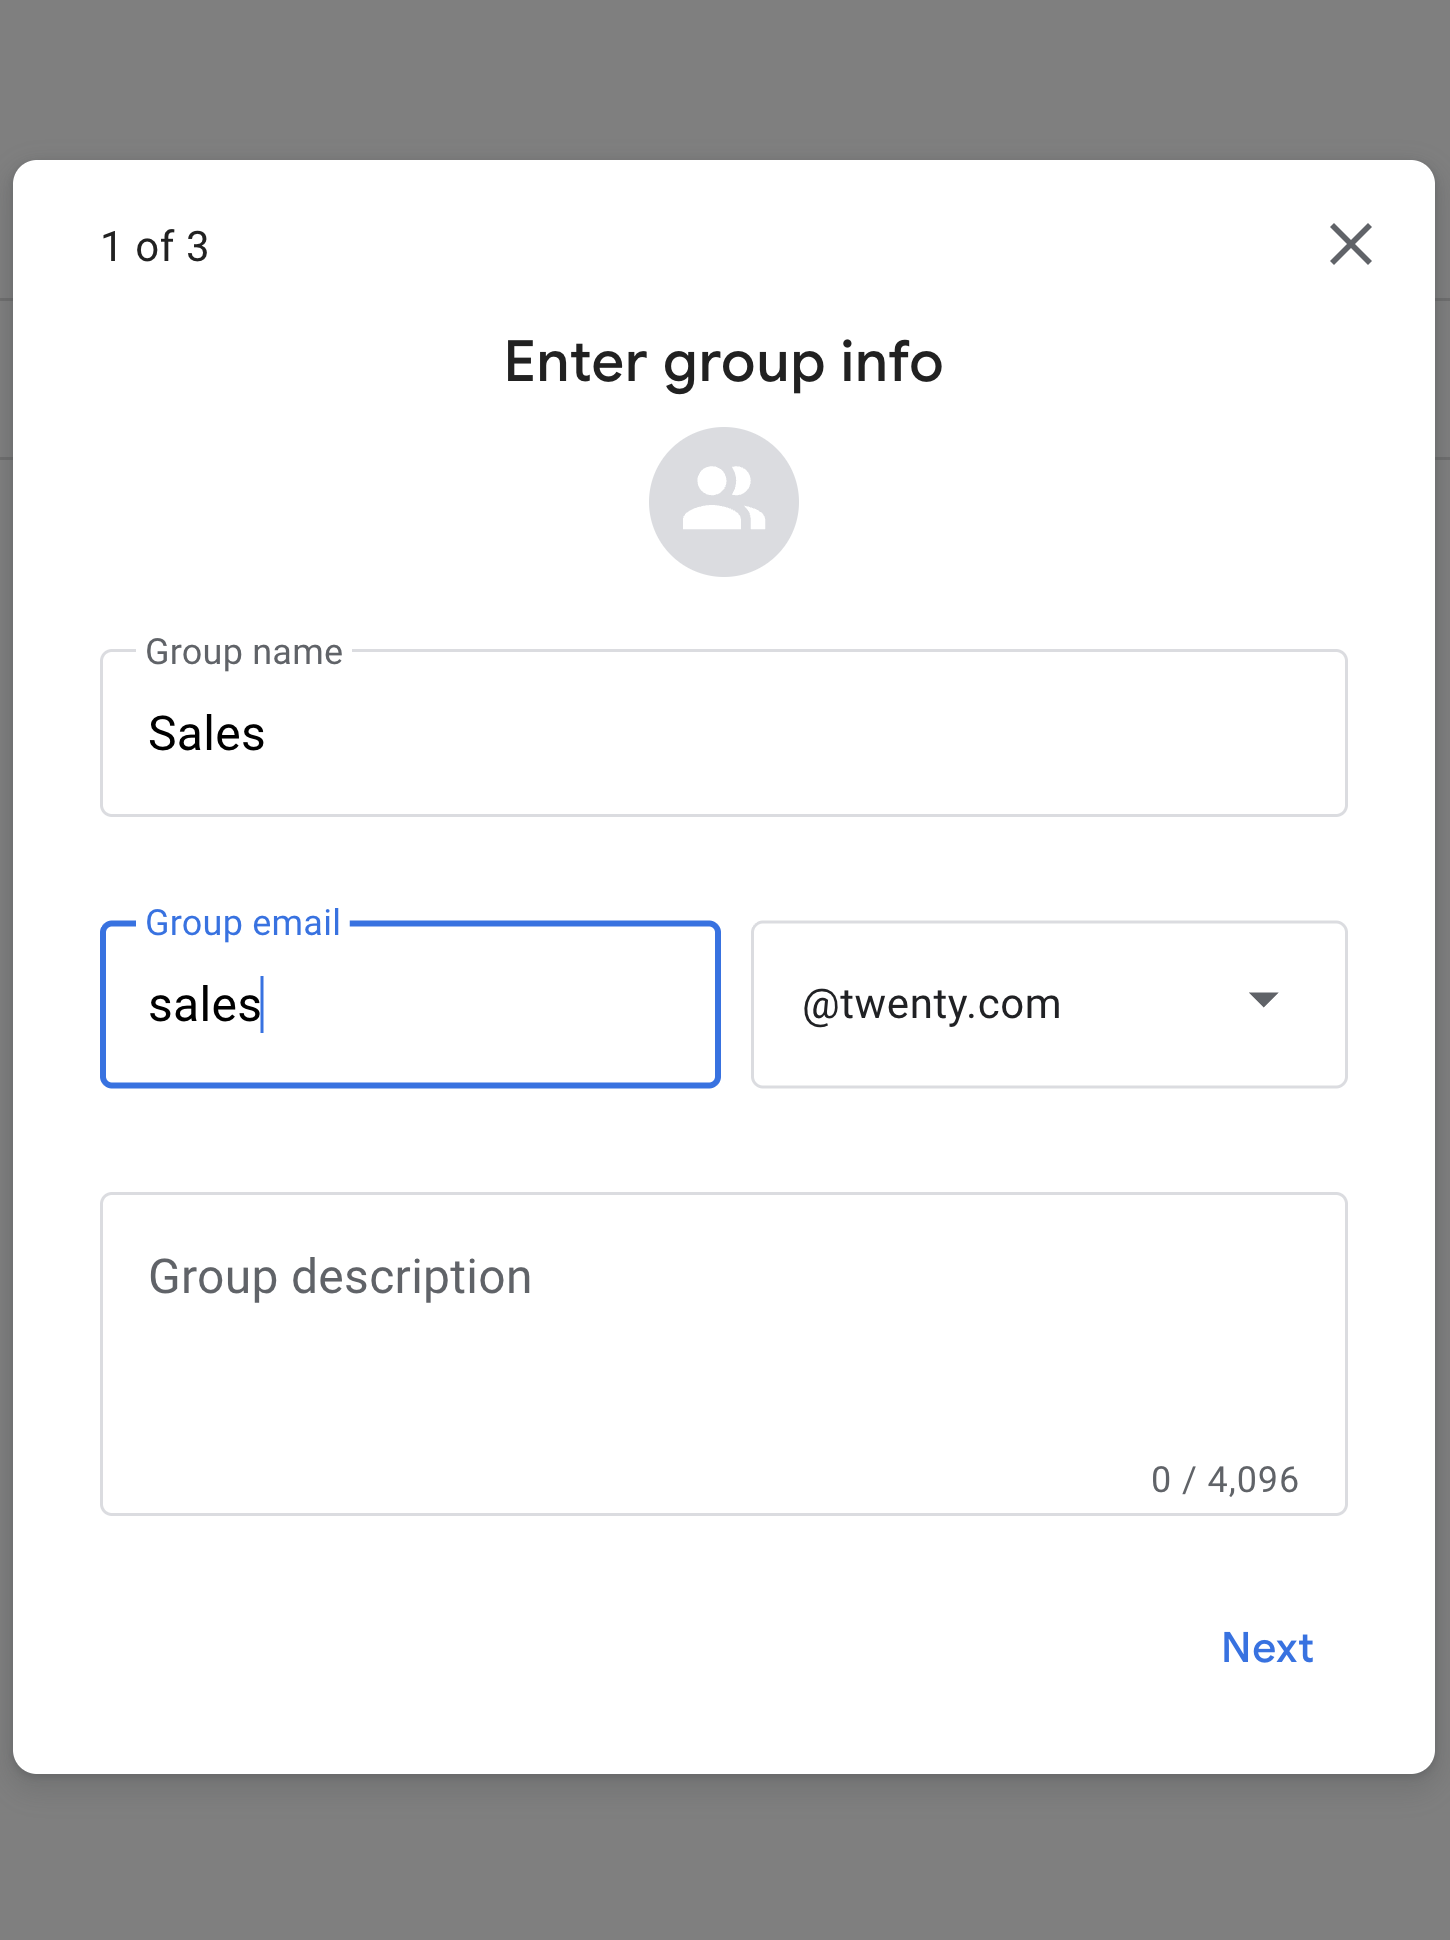 3. Click **Next** twice, then **Create group**.
4. Now follow Part 2 and Part 3.
## Part 4: Test it
Send an email from an outside address (a personal Gmail works) to `sales@yourcompany.com`. It should appear in Twenty within a minute or two.
## Troubleshooting
The group does not accept external members. Return to Part 2, step 3. If the
setting is locked, only a Workspace admin can unlock it.
3. Click **Next** twice, then **Create group**.
4. Now follow Part 2 and Part 3.
## Part 4: Test it
Send an email from an outside address (a personal Gmail works) to `sales@yourcompany.com`. It should appear in Twenty within a minute or two.
## Troubleshooting
The group does not accept external members. Return to Part 2, step 3. If the
setting is locked, only a Workspace admin can unlock it.
 Open the member in the group and check its subscription is **Each email**, not
**No email**, **Digest** or **Abridged**.
**Who can post** is not set to **Anyone on the web**. See Part 2, step 4.
Receiving and sending are separate. Sending requires your domain to be
verified under the channel's **Sending domain** section, which means adding
the DNS records Twenty lists there.
Using a different provider? See [Microsoft 365](/user-guide/calendar-emails/how-tos/forward-a-shared-inbox-from-microsoft-365) or [any other mail provider](/user-guide/calendar-emails/how-tos/forward-a-shared-inbox-from-any-mail-provider).
Open the member in the group and check its subscription is **Each email**, not
**No email**, **Digest** or **Abridged**.
**Who can post** is not set to **Anyone on the web**. See Part 2, step 4.
Receiving and sending are separate. Sending requires your domain to be
verified under the channel's **Sending domain** section, which means adding
the DNS records Twenty lists there.
Using a different provider? See [Microsoft 365](/user-guide/calendar-emails/how-tos/forward-a-shared-inbox-from-microsoft-365) or [any other mail provider](/user-guide/calendar-emails/how-tos/forward-a-shared-inbox-from-any-mail-provider).