> ## Documentation Index
> Fetch the complete documentation index at: https://docs.twenty.com/llms.txt
> Use this file to discover all available pages before exploring further.
# Auto-Reply to Inbound Emails
> Build a workflow that uses AI to triage incoming emails and send threaded replies automatically.
Respond to inbound emails in seconds — not hours. This workflow uses an AI Agent to filter out noise (newsletters, spam, auto-replies) and draft a personalized response to real messages, then sends it as a threaded reply inside the original conversation.
## How email threading works
Every email carries a hidden `Message-ID` header — a unique fingerprint assigned by the sender's mail server. When you reply to an email, your mail client sets an `In-Reply-To` header referencing that fingerprint. That's how Gmail, Outlook, and every other client groups messages into threads.
In Twenty, that fingerprint is stored as `headerMessageId` on the Message object. Your workflow grabs it and passes it into the Send Email action's In-Reply-To field.
## Building the workflow
### Step 1: Create a new workflow
Head to **Settings -> Workflows** and click **+ New Workflow**.
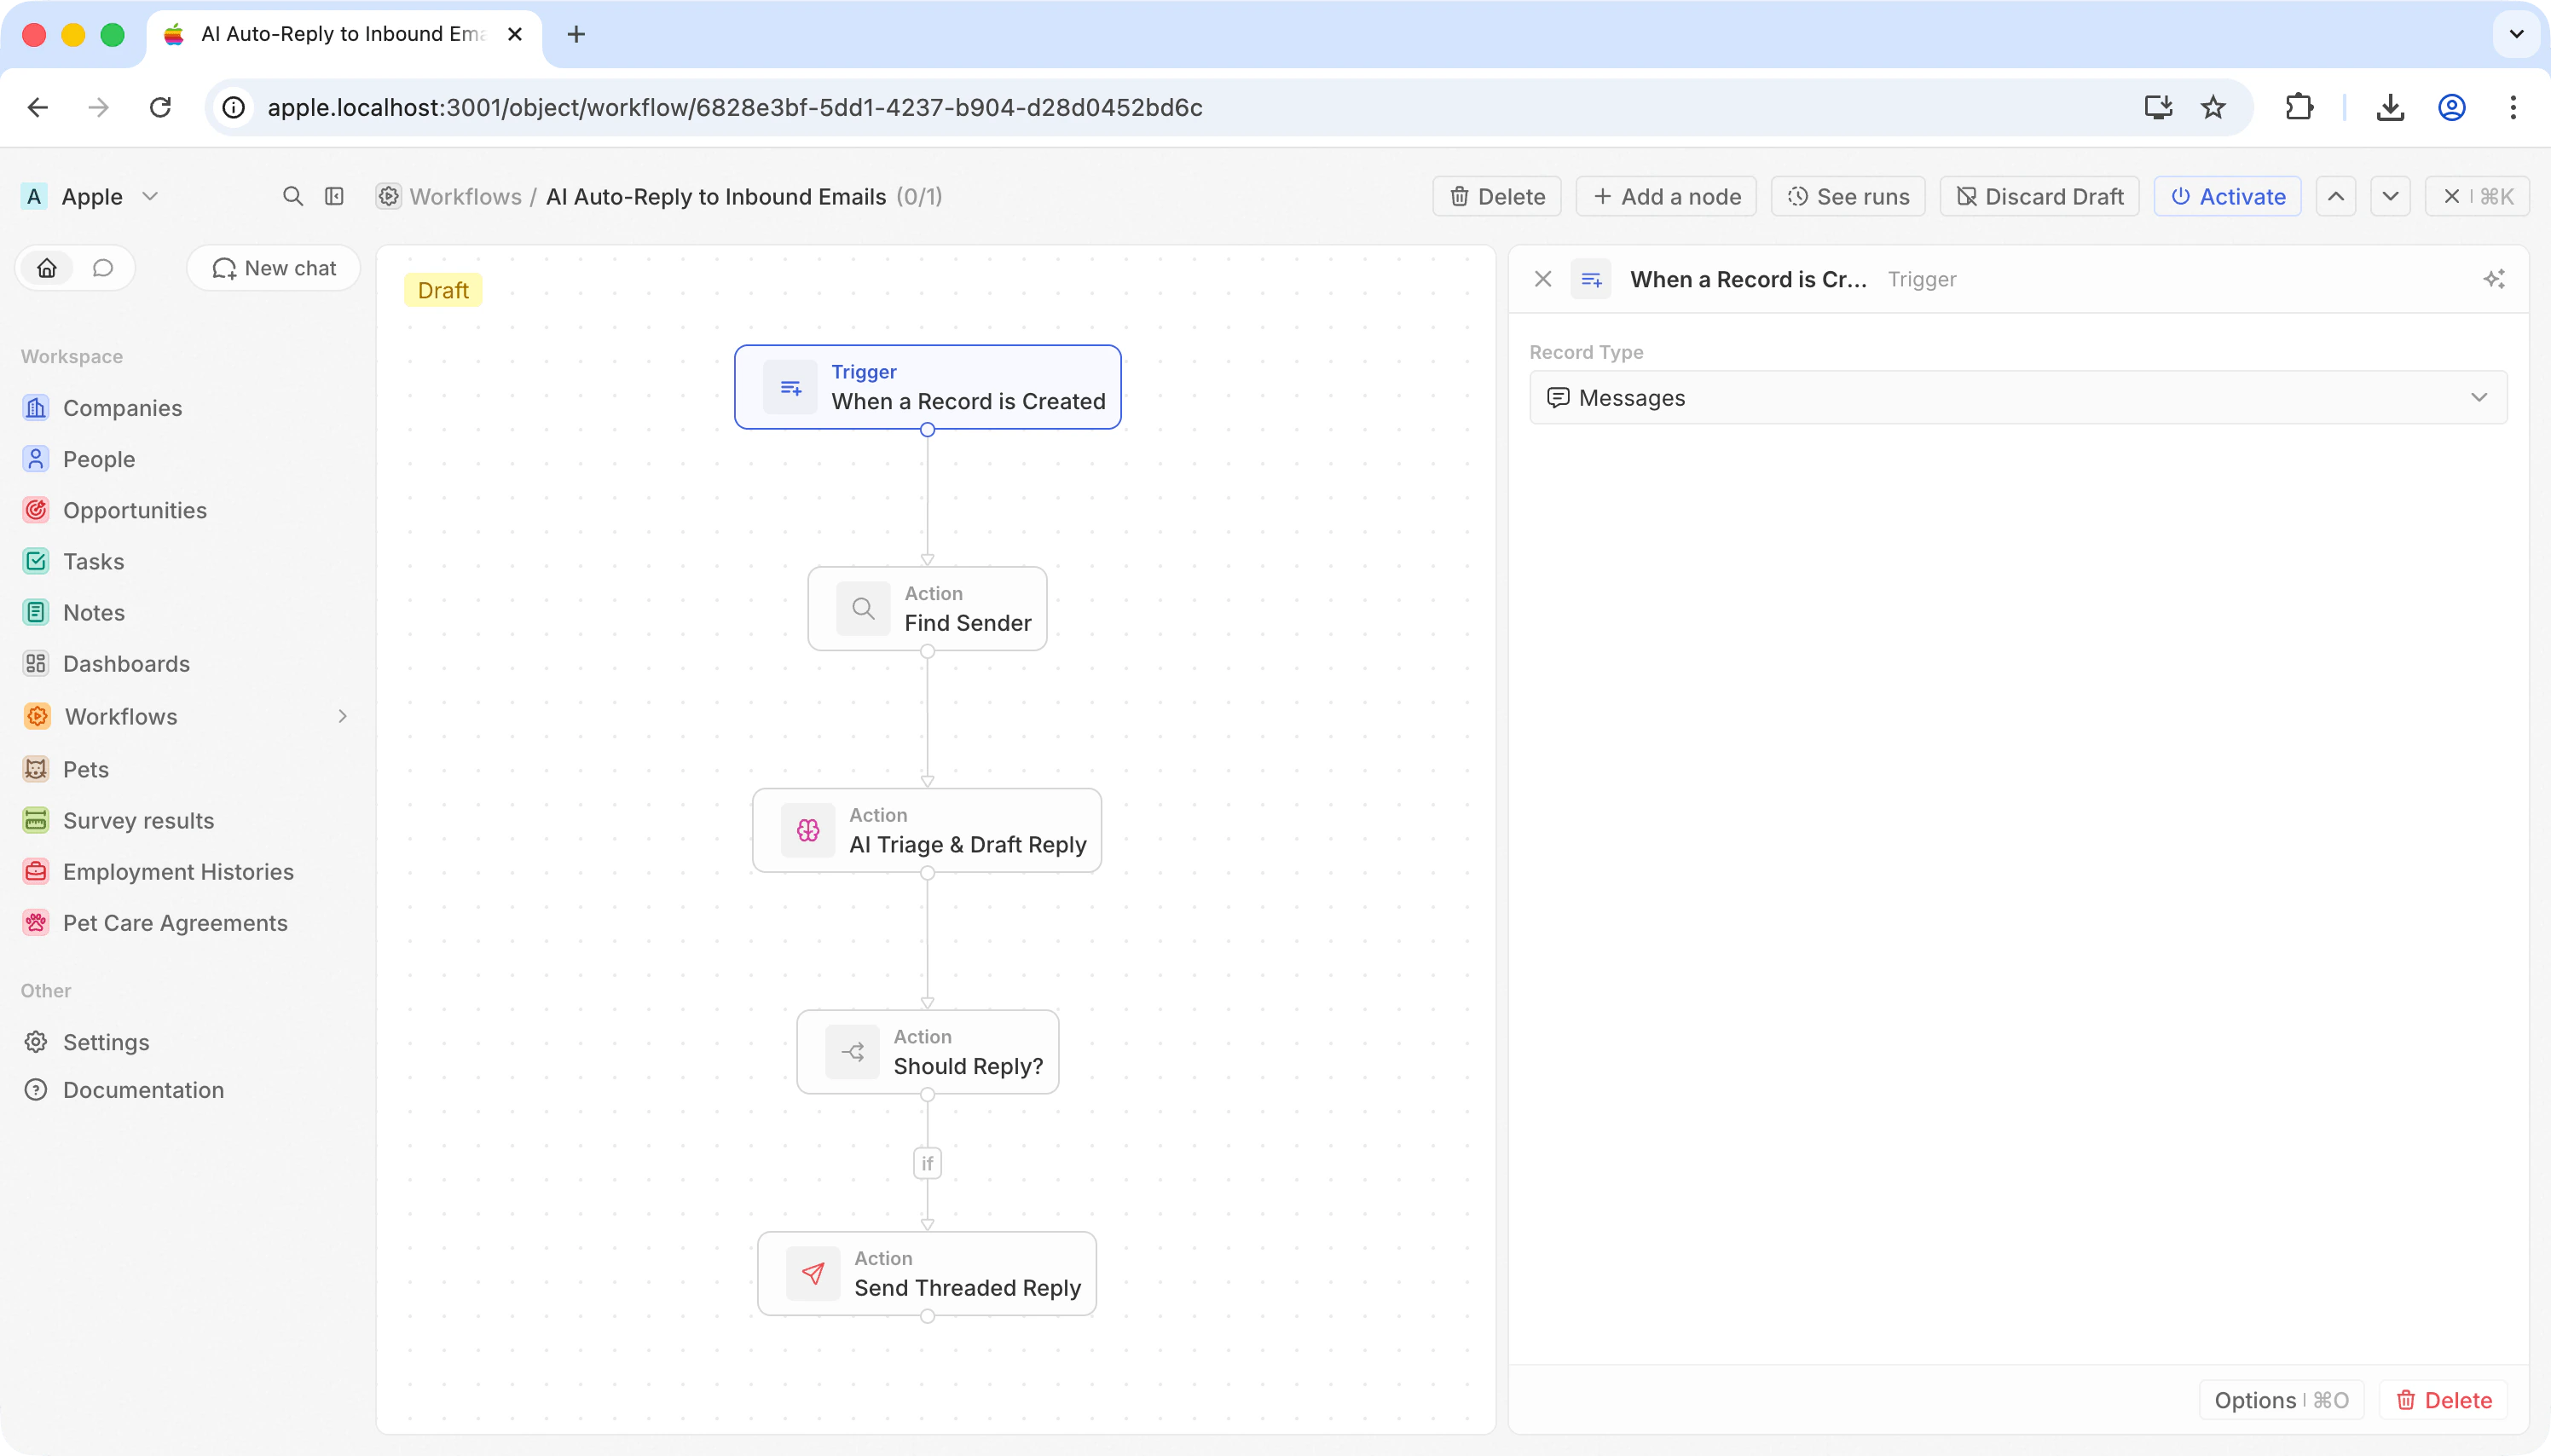
### Step 2: Trigger on incoming messages
Pick **When a Record is Created** and choose **Messages**.
Every time an email lands in Twenty, this fires.
 ### Step 3: Look up who sent it
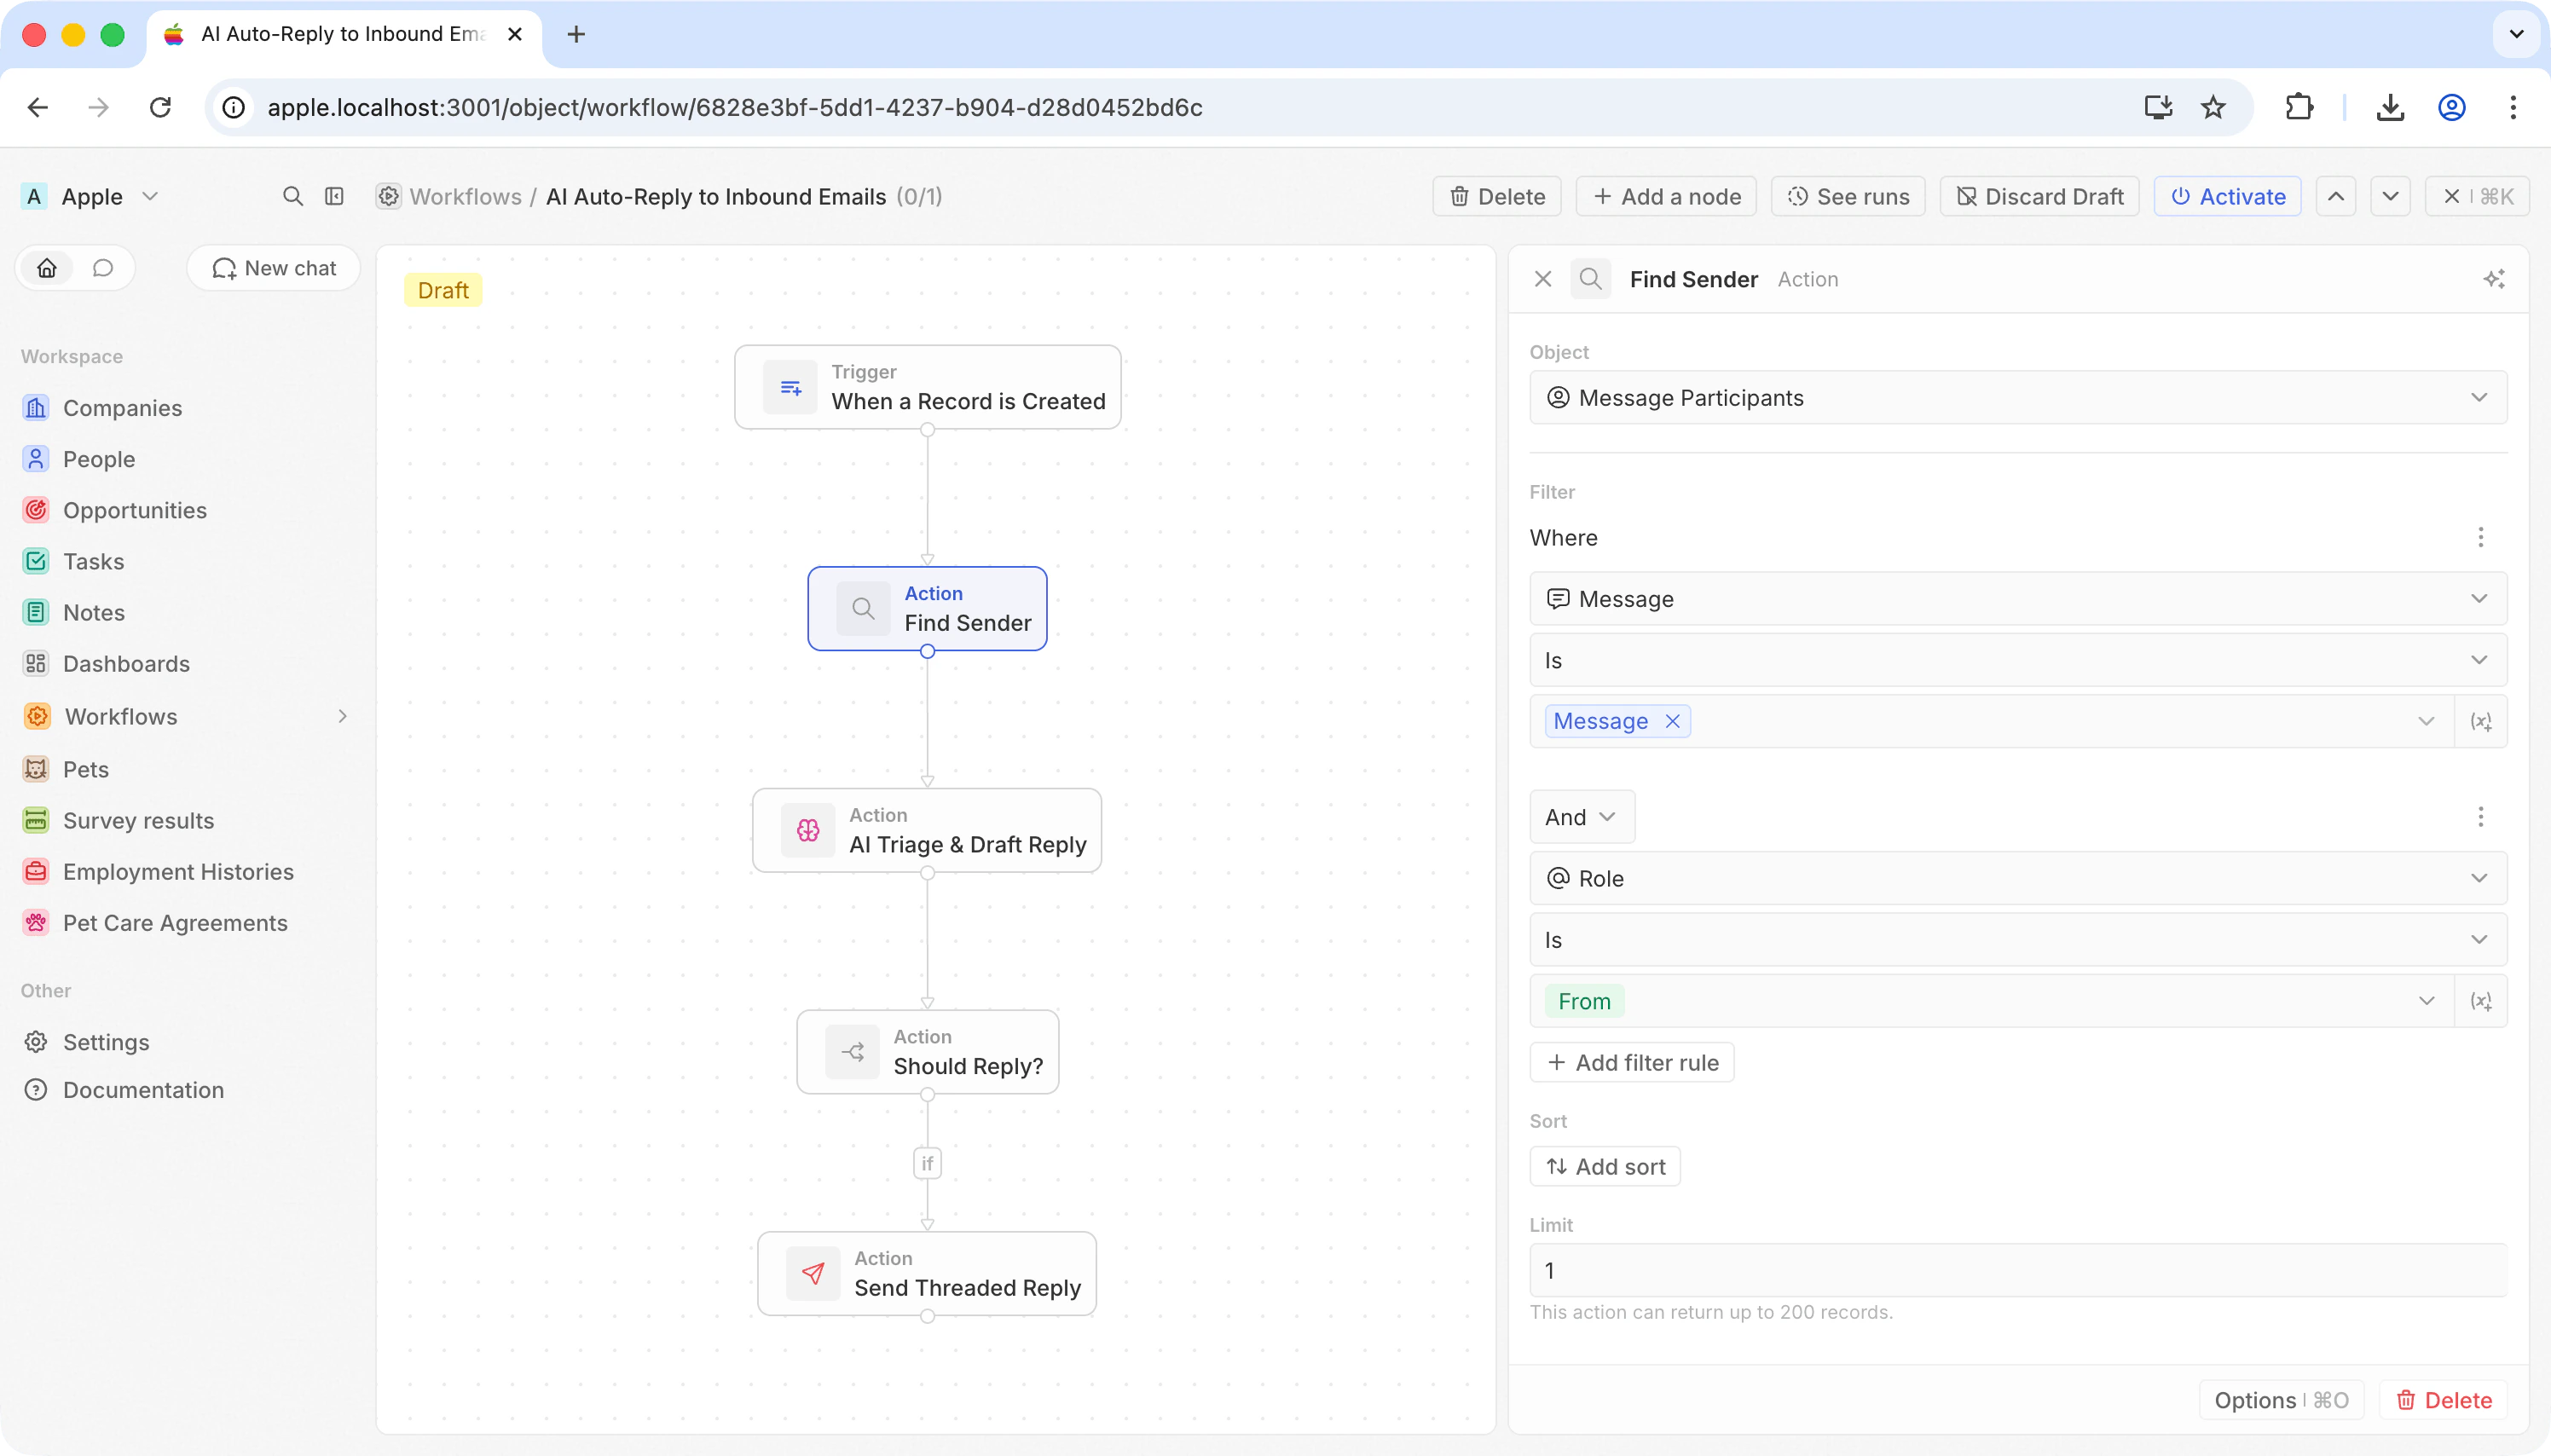
Add a **Search Records** action.
The sender's address isn't on the message itself — it's on the related Message Participant record.
| Field | Value |
| ---------- | ------------------------------- |
| **Object** | Message Participants |
| **Filter** | Message **is** `{{trigger.id}}` |
| **Filter** | Role **is** From |
| **Limit** | 1 |
This gives you the sender's email in `handle` and their name in `displayName`.
### Step 3: Look up who sent it
Add a **Search Records** action.
The sender's address isn't on the message itself — it's on the related Message Participant record.
| Field | Value |
| ---------- | ------------------------------- |
| **Object** | Message Participants |
| **Filter** | Message **is** `{{trigger.id}}` |
| **Filter** | Role **is** From |
| **Limit** | 1 |
This gives you the sender's email in `handle` and their name in `displayName`.
 ### Step 4: AI triage and draft reply
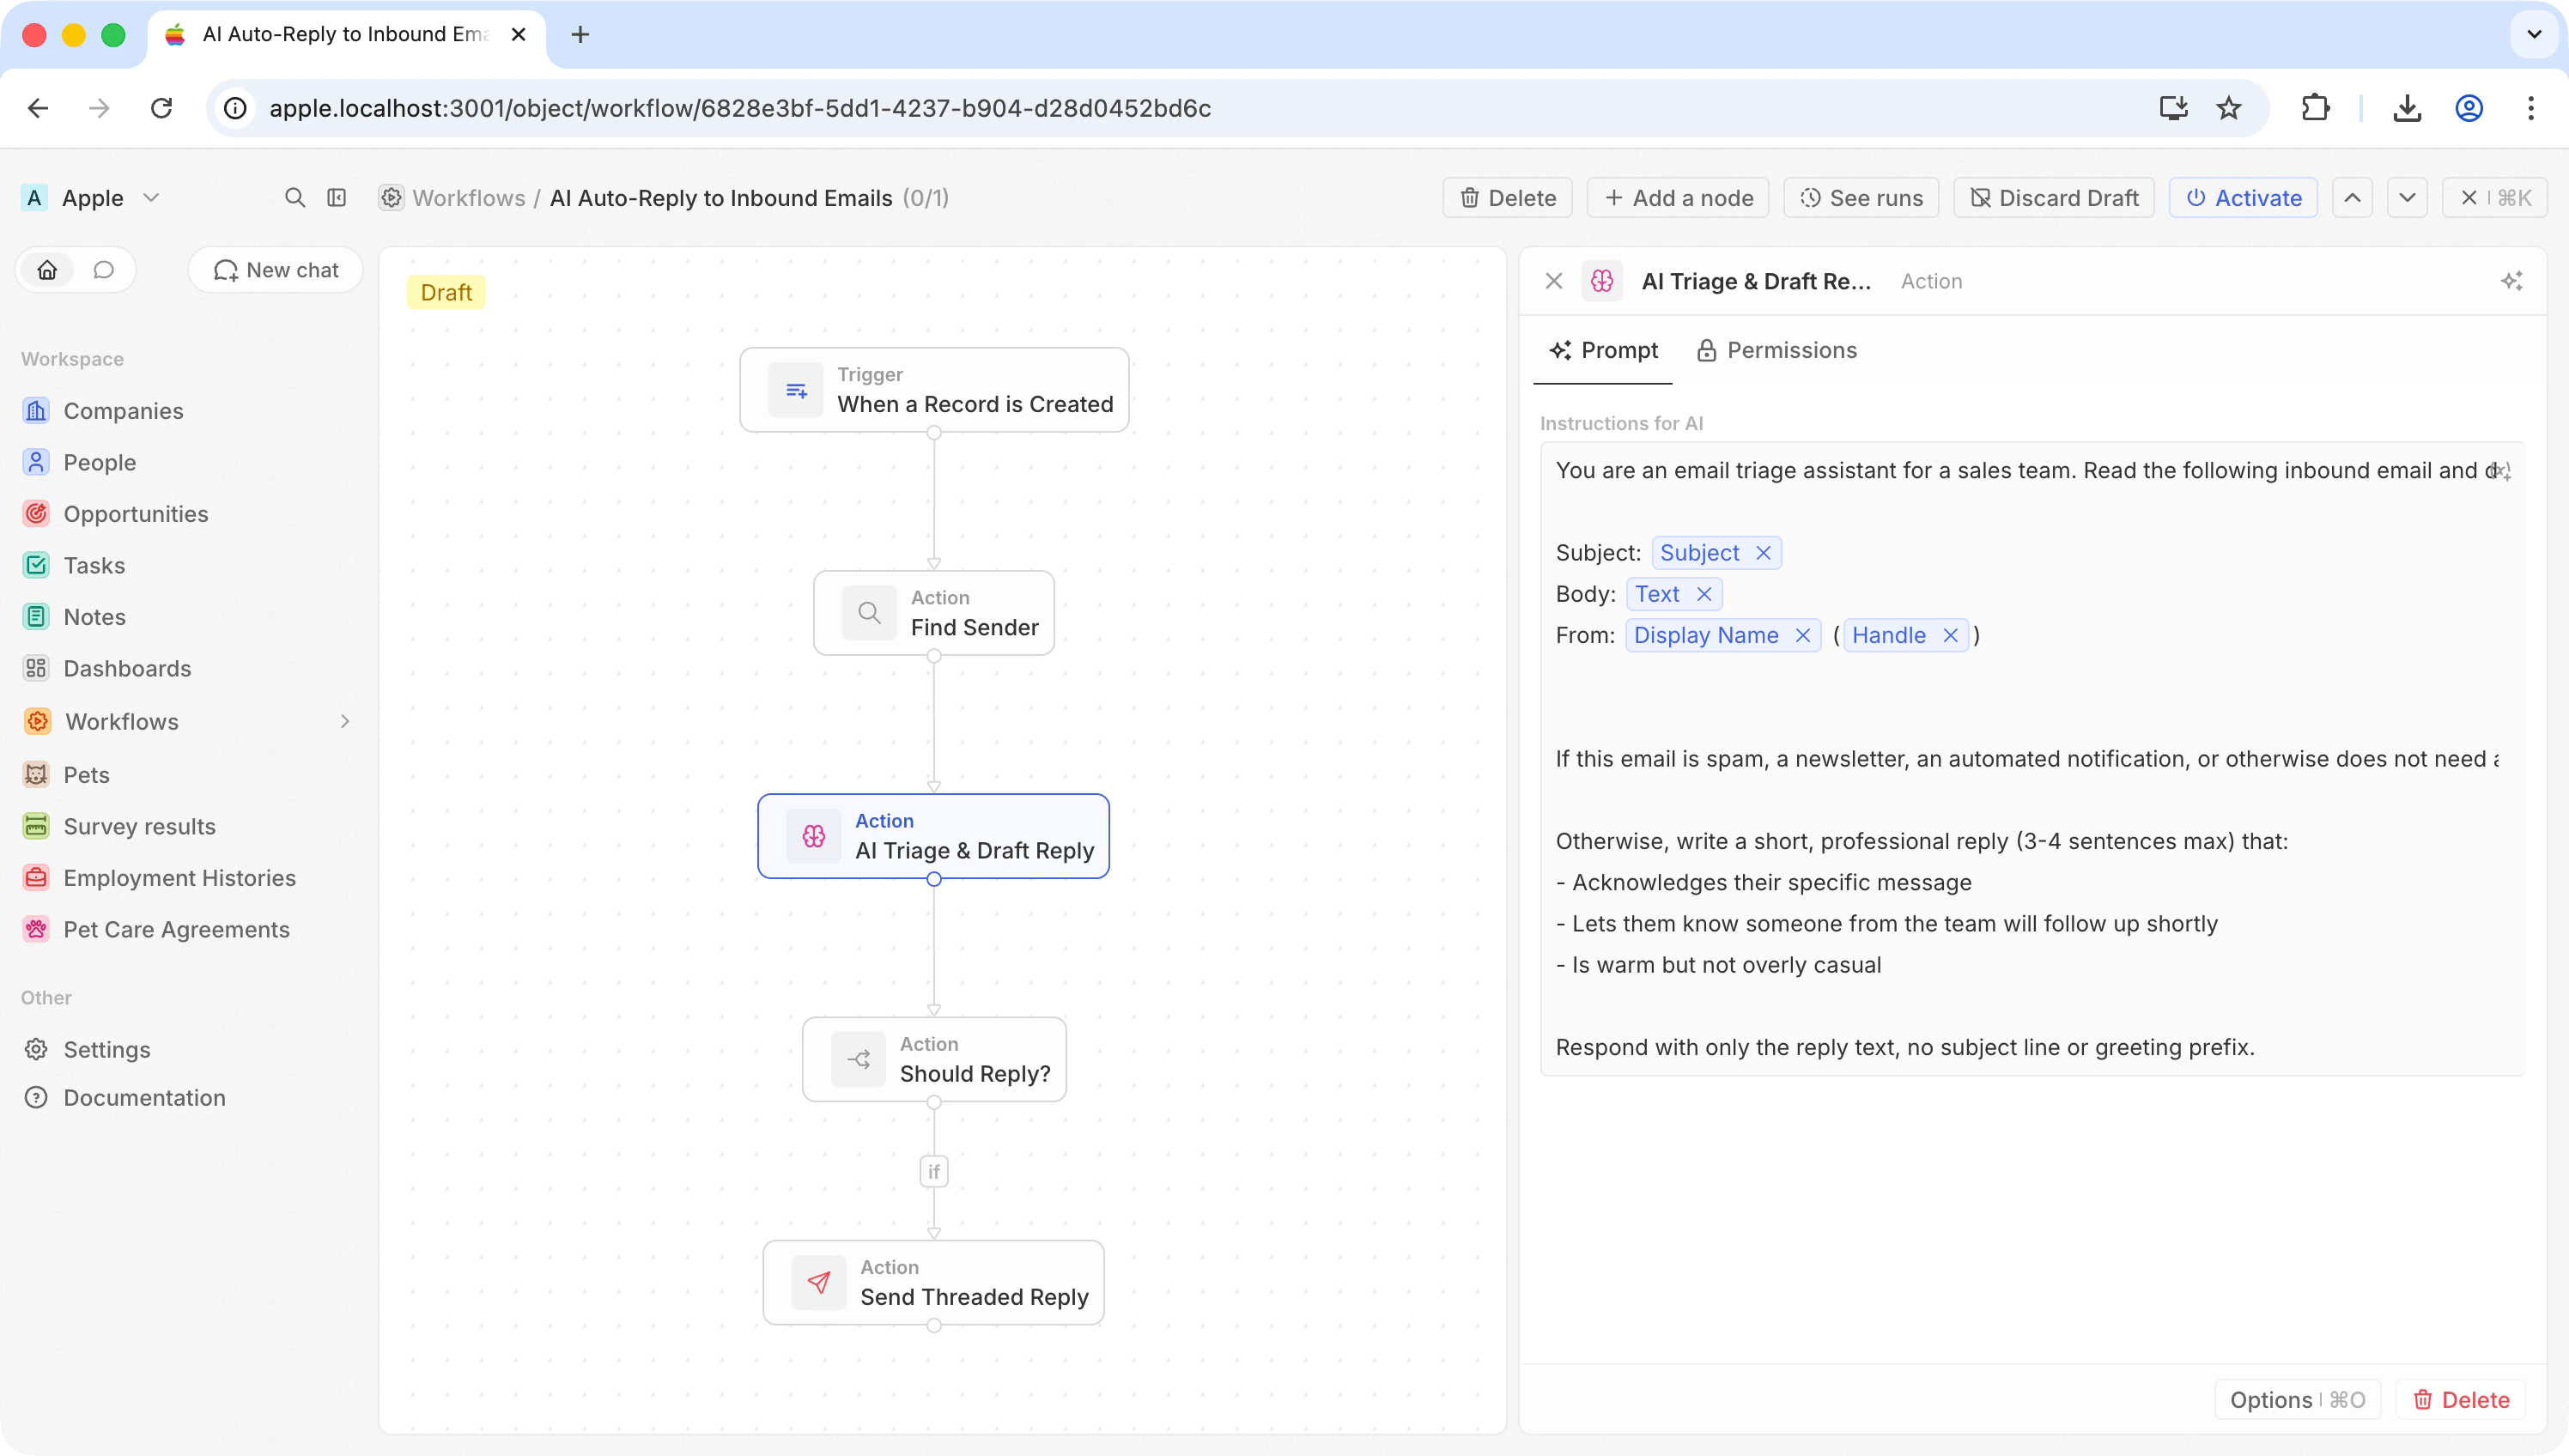
Add an **AI Agent** action. This single step does two things: decides whether the email deserves a reply, and if so, writes one.
Use a prompt like:
```
You are an email triage assistant for a sales team. Read the following
inbound email and decide if it deserves a reply.
Subject: {{trigger.subject}}
Body: {{trigger.text}}
From: {{Find Sender.first.displayName}} ({{Find Sender.first.handle}})
If this email is spam, a newsletter, an automated notification, or
otherwise does not need a human reply, respond with exactly: SKIP
Otherwise, write a short, professional reply (3-4 sentences max) that:
- Acknowledges their specific message
- Lets them know someone from the team will follow up shortly
- Is warm but not overly casual
Respond with only the reply text, no subject line or greeting prefix.
```
The AI Agent outputs its response in a `response` field that the next steps can reference.
### Step 4: AI triage and draft reply
Add an **AI Agent** action. This single step does two things: decides whether the email deserves a reply, and if so, writes one.
Use a prompt like:
```
You are an email triage assistant for a sales team. Read the following
inbound email and decide if it deserves a reply.
Subject: {{trigger.subject}}
Body: {{trigger.text}}
From: {{Find Sender.first.displayName}} ({{Find Sender.first.handle}})
If this email is spam, a newsletter, an automated notification, or
otherwise does not need a human reply, respond with exactly: SKIP
Otherwise, write a short, professional reply (3-4 sentences max) that:
- Acknowledges their specific message
- Lets them know someone from the team will follow up shortly
- Is warm but not overly casual
Respond with only the reply text, no subject line or greeting prefix.
```
The AI Agent outputs its response in a `response` field that the next steps can reference.
 ### Step 5: Branch on the AI decision
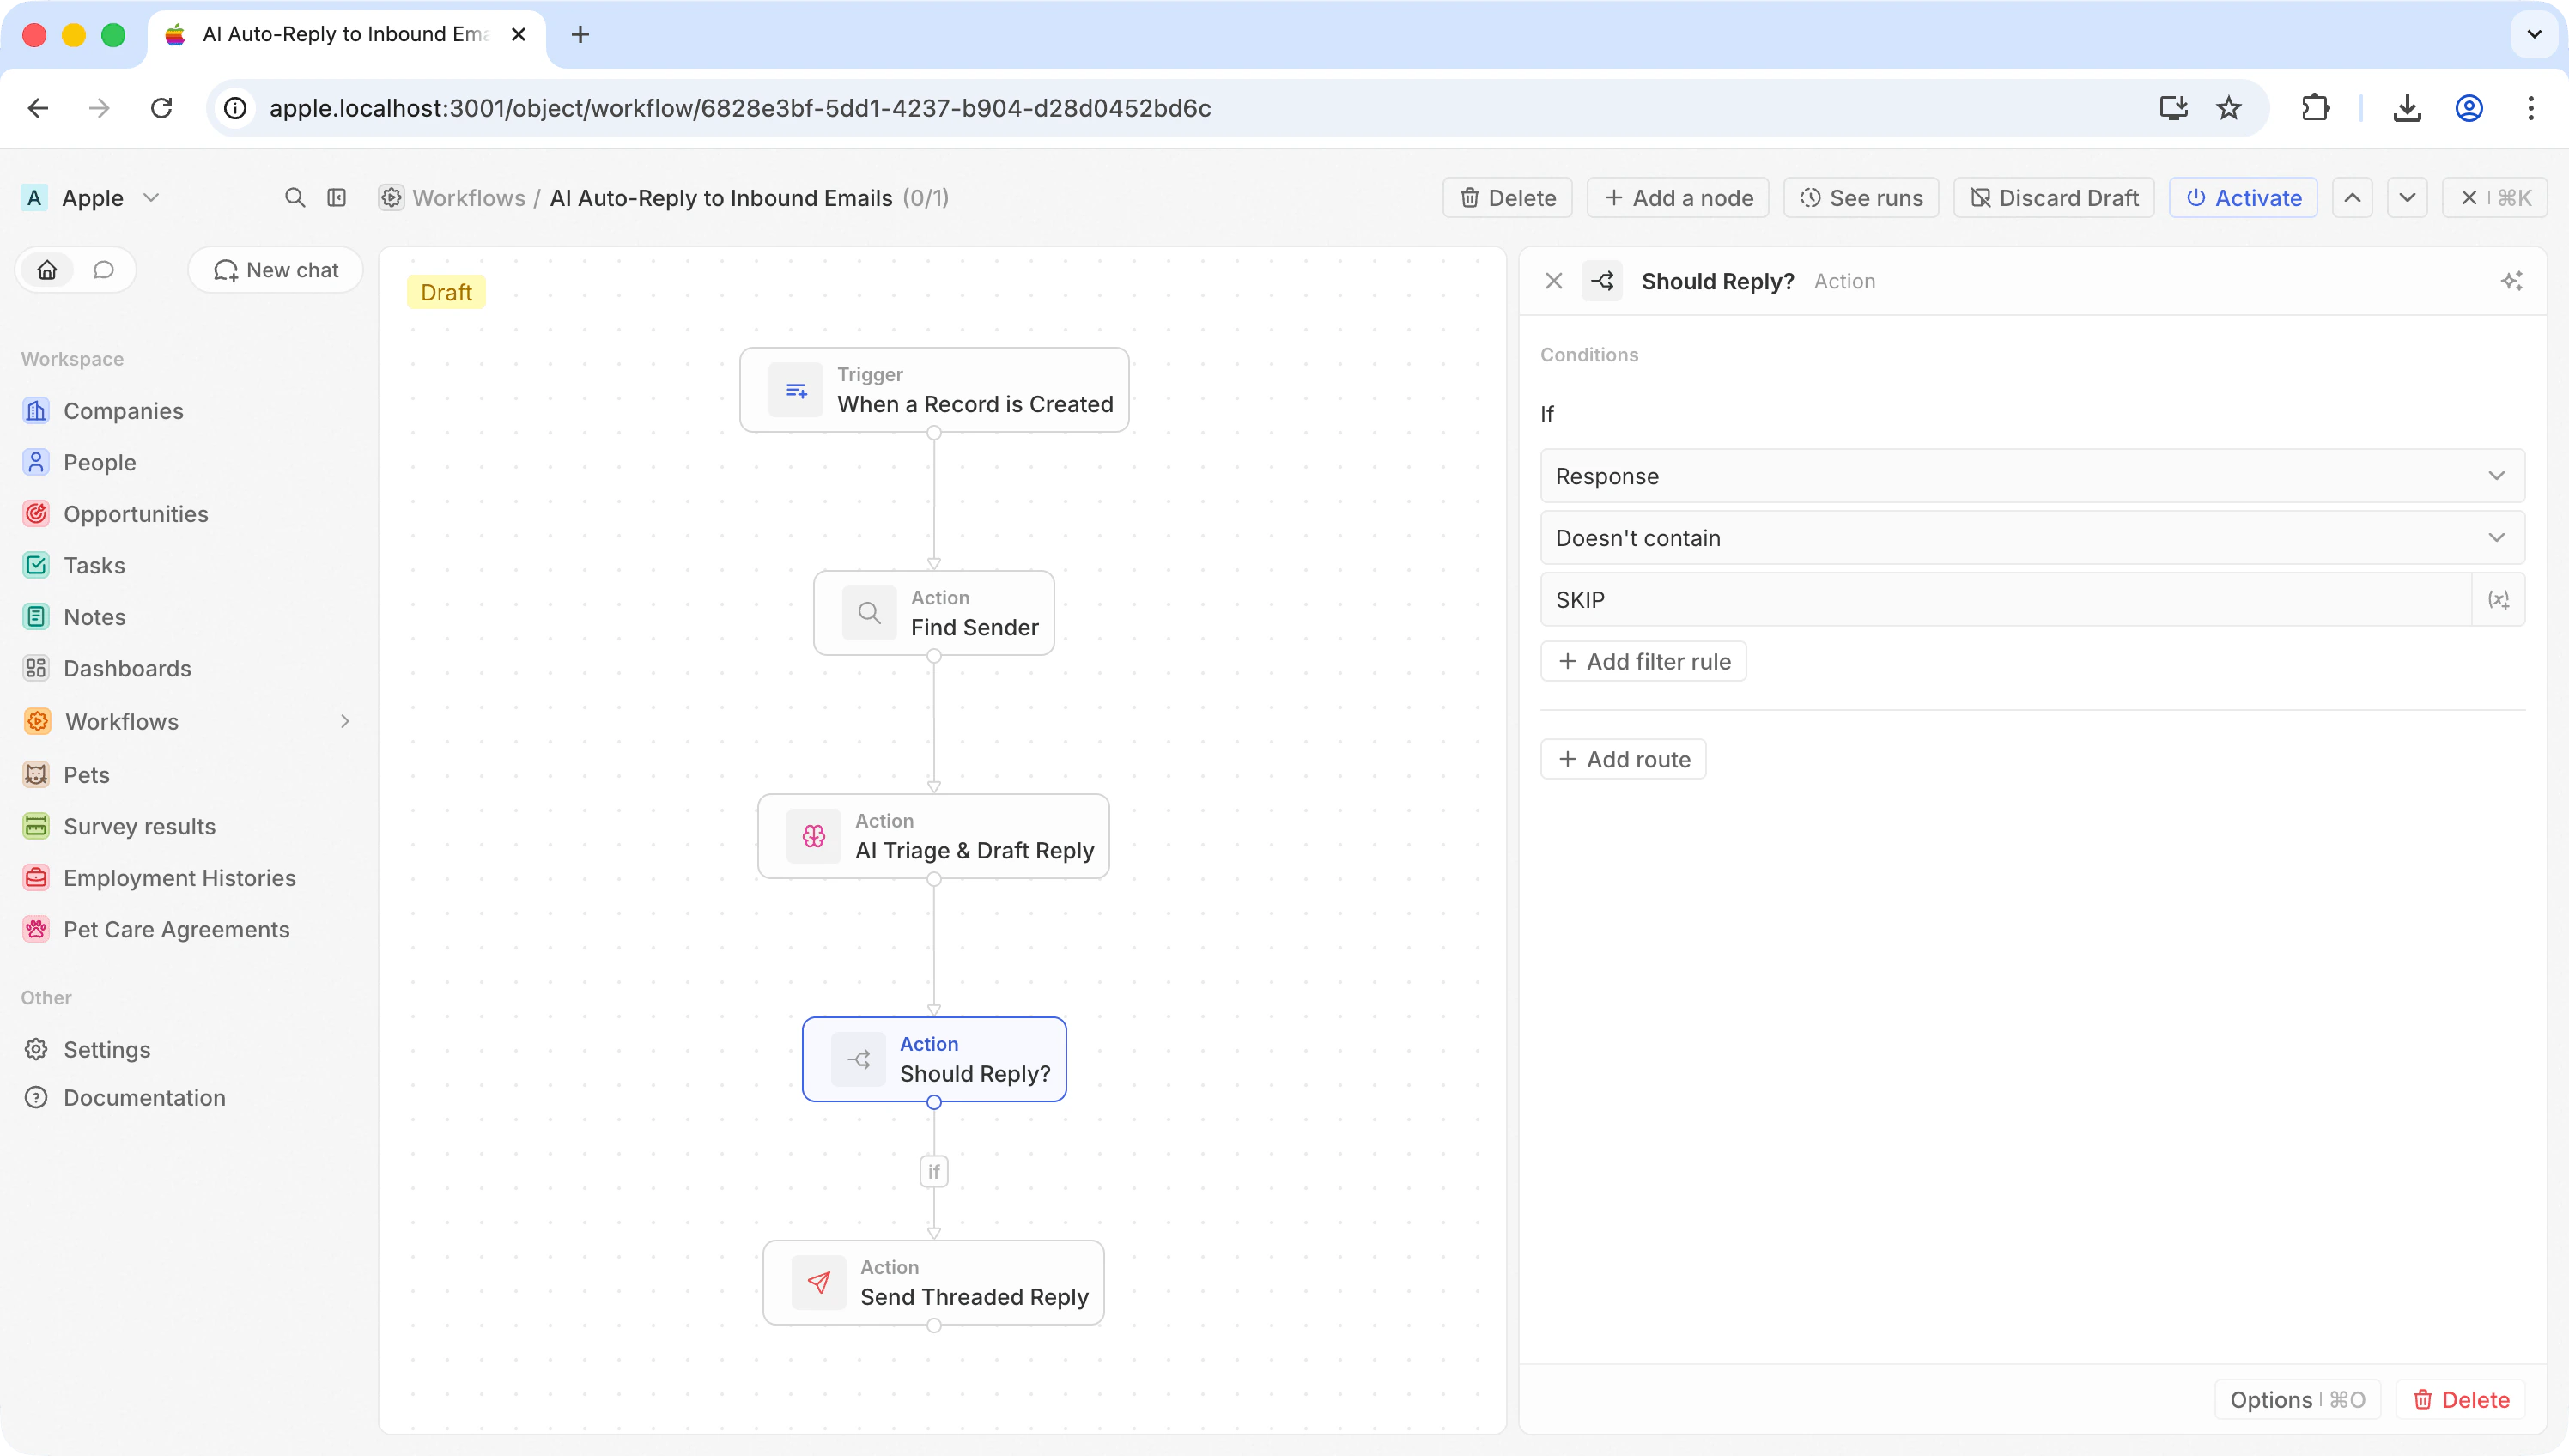
Add an **If/Else** action to check whether the AI decided to reply or skip.
| Field | Value |
| ------------- | ----------------------------------------------- |
| **Condition** | AI Agent `response` **does not contain** `SKIP` |
| **If true** | Continue to Send Email |
| **Else** | Do nothing (workflow ends) |
Spam, newsletters, and auto-generated messages get dropped. Everything else moves to the next step.
### Step 5: Branch on the AI decision
Add an **If/Else** action to check whether the AI decided to reply or skip.
| Field | Value |
| ------------- | ----------------------------------------------- |
| **Condition** | AI Agent `response` **does not contain** `SKIP` |
| **If true** | Continue to Send Email |
| **Else** | Do nothing (workflow ends) |
Spam, newsletters, and auto-generated messages get dropped. Everything else moves to the next step.
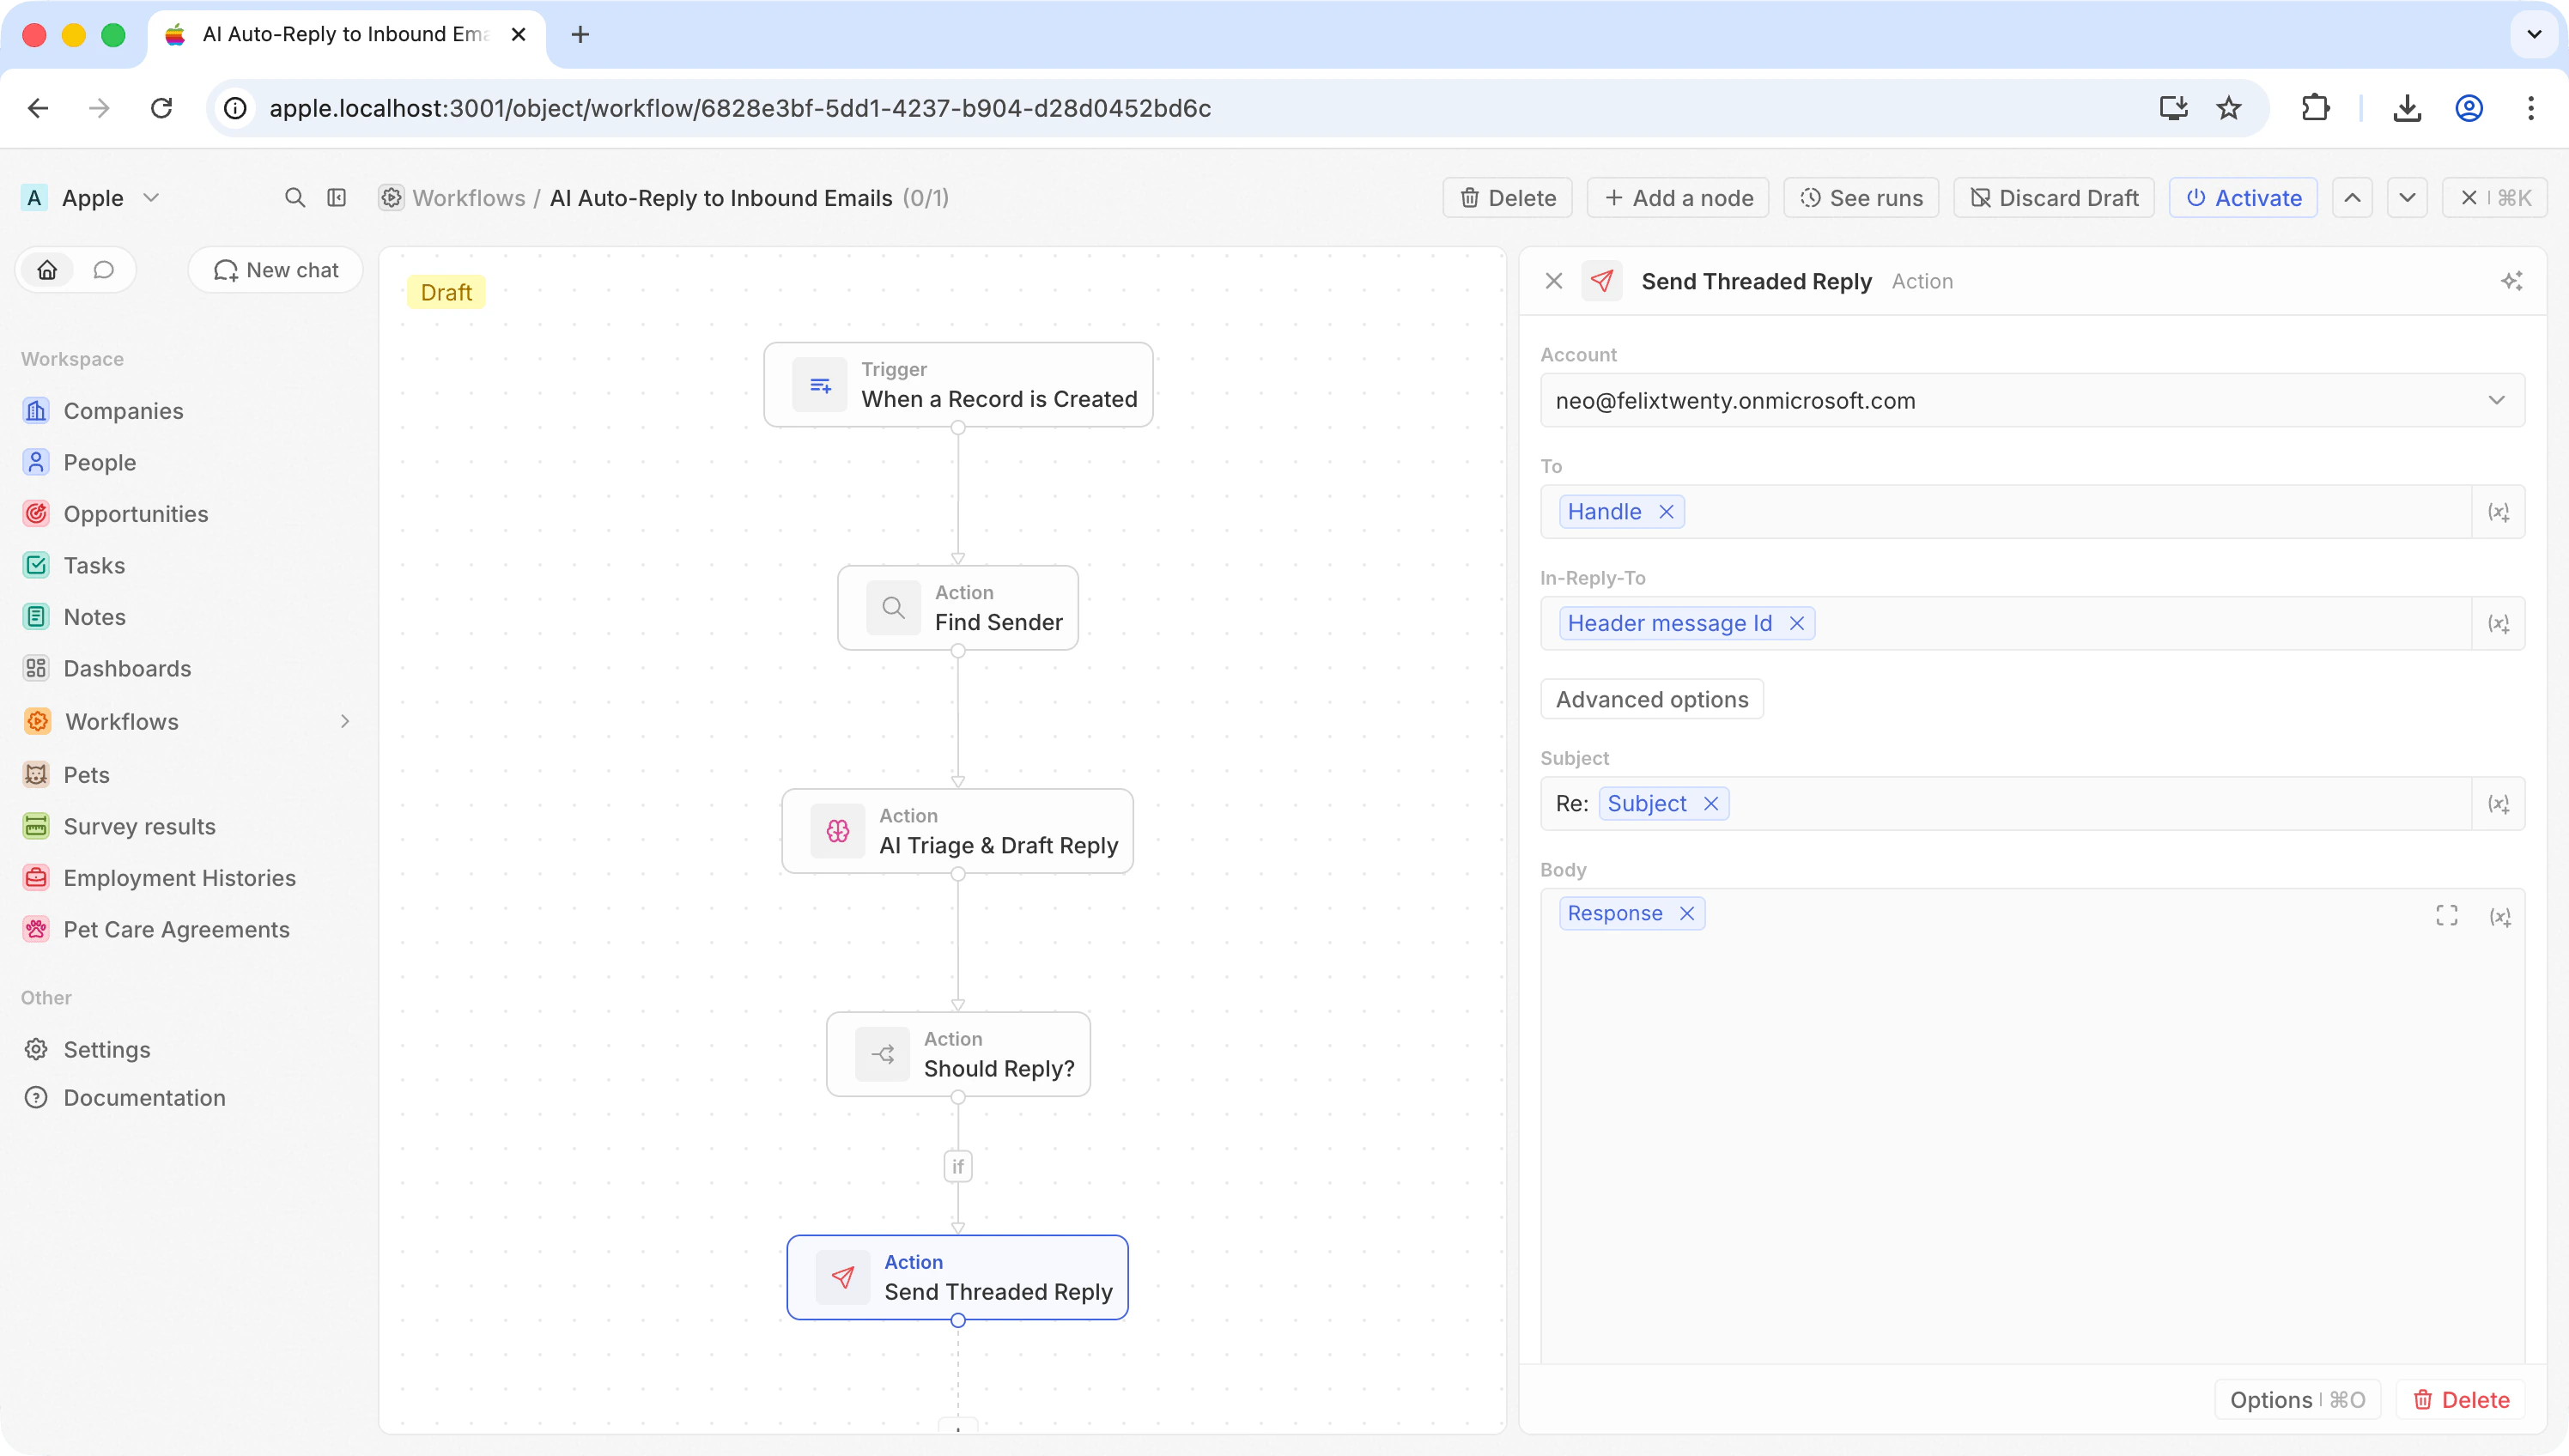
 ### Step 6: Send a threaded reply
Add a **Send Email** action on the "if true" branch. Click **Advanced options**, then **Add In-Reply-To**.
| Field | Value |
| --------------- | -------------------------------------- |
| **To** | `{{Find Sender.first.handle}}` |
| **Subject** | `Re: {{trigger.subject}}` |
| **Body** | `{{AI Triage & Draft Reply.response}}` |
| **In-Reply-To** | `{{trigger.headerMessageId}}` |
The In-Reply-To field is what makes this a reply instead of a new conversation. The recipient sees it threaded under the original email in Gmail, Outlook, or any other client.
### Step 6: Send a threaded reply
Add a **Send Email** action on the "if true" branch. Click **Advanced options**, then **Add In-Reply-To**.
| Field | Value |
| --------------- | -------------------------------------- |
| **To** | `{{Find Sender.first.handle}}` |
| **Subject** | `Re: {{trigger.subject}}` |
| **Body** | `{{AI Triage & Draft Reply.response}}` |
| **In-Reply-To** | `{{trigger.headerMessageId}}` |
The In-Reply-To field is what makes this a reply instead of a new conversation. The recipient sees it threaded under the original email in Gmail, Outlook, or any other client.
 **In-Reply-To** expects a `message.headerMessageId` from the trigger — it's the email's unique fingerprint, not a recipient address. If you leave it empty, the email still sends, just as a standalone message.
Gmail uses the subject line to group messages into threads. The subject **must** start with `Re:` (including the colon and space) for Gmail to display the reply inside the original thread. Without it, the reply will appear as a separate conversation — even if the In-Reply-To header is set correctly.
### Step 7: Test and activate
Hit **Test**, then check your email client. The reply should appear nested under the original message.
Activate when you're happy with it.
## Ideas to build on
* **Only reply to VIPs** — add a branch that checks the sender's domain or whether they exist as a Contact in Twenty
* **Route by intent** — use separate AI Agent prompts to handle sales inquiries differently from support requests
* **Enrich before replying** — add a Search Records step to pull the sender's company or deal history into the AI prompt for more personalized replies
**In-Reply-To** expects a `message.headerMessageId` from the trigger — it's the email's unique fingerprint, not a recipient address. If you leave it empty, the email still sends, just as a standalone message.
Gmail uses the subject line to group messages into threads. The subject **must** start with `Re:` (including the colon and space) for Gmail to display the reply inside the original thread. Without it, the reply will appear as a separate conversation — even if the In-Reply-To header is set correctly.
### Step 7: Test and activate
Hit **Test**, then check your email client. The reply should appear nested under the original message.
Activate when you're happy with it.
## Ideas to build on
* **Only reply to VIPs** — add a branch that checks the sender's domain or whether they exist as a Contact in Twenty
* **Route by intent** — use separate AI Agent prompts to handle sales inquiries differently from support requests
* **Enrich before replying** — add a Search Records step to pull the sender's company or deal history into the AI prompt for more personalized replies