How Branches Work
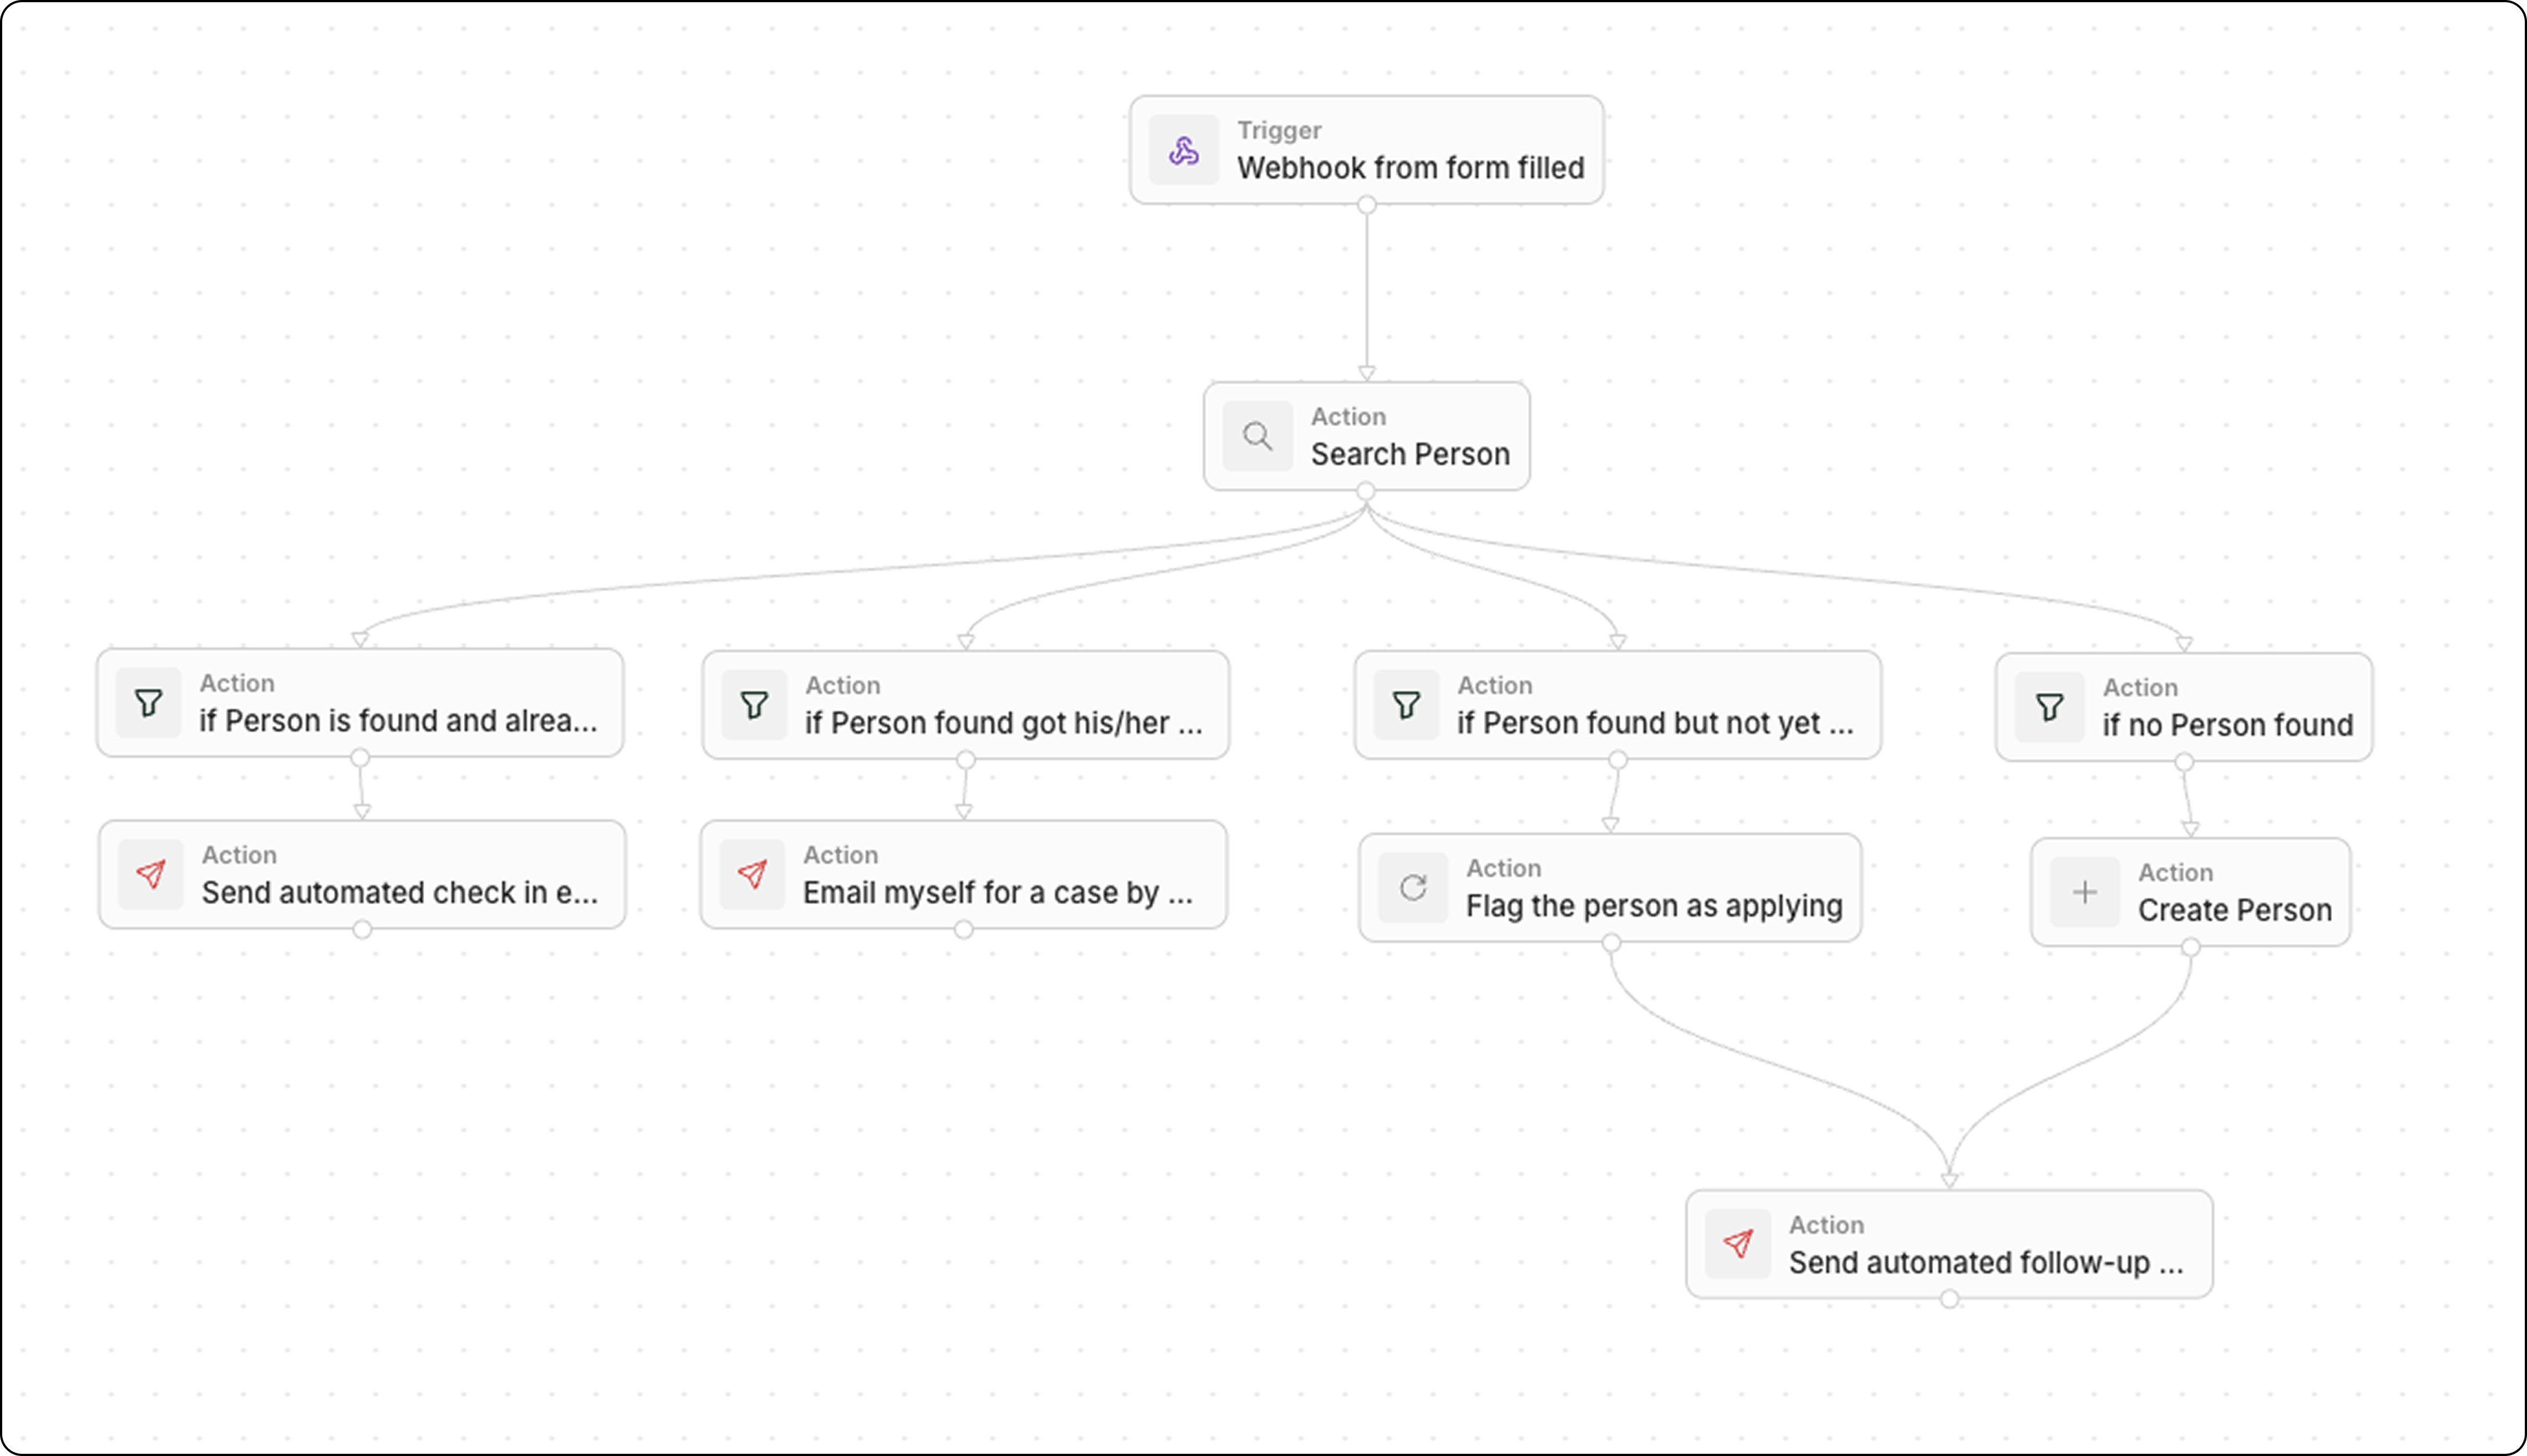
When you create multiple connections from a single node, each path becomes a branch. By default, all branches execute in parallel—they don’t wait for each other.Creating Branches
Add a New Branch
- Right-click on the main canvas of the workflow (not on an existing node)
- Click Add node
- Choose the node type for your new branch
- Drag an arrow from the bottom of the previous step to the top of this new action
- Repeat to add more branches from the same node
Each branch is independent. Adding a branch doesn’t affect other existing paths from that node.
Visual Layout
Branches appear as parallel paths in the workflow editor. You can drag nodes to rearrange the visual layout without affecting execution.Conditional Branches
Since all branches run by default, use Filter nodes to control which paths actually execute:| Branch | Filter Condition | Action |
|---|---|---|
| A | Stage = “Won” | Send congratulations email |
| B | Stage = “Lost” | Create follow-up task |
| C | Stage = “Negotiation” | Notify manager |
- Create branches from your trigger or action
- Add a Filter node as the first step of each branch
- Configure each filter with mutually exclusive conditions
- Add your actions after each filter
Merging Branches
Branches don’t automatically merge. Each branch runs independently until it ends. You have full flexibility in how you handle this:- Option 1: Keep branches separate Each branch handles its own follow-up actions independently. This is the simplest approach when branches don’t need to converge.
- Option 2: Merge branches manually When creating your workflow, you can manually connect multiple branches to the same downstream action. Simply drag arrows from the end of each branch to a common node.
While you can use a Delay node to pause execution, it’s not currently configurable to wait “until another branch ends.”
Related
- How to Use Branches in Workflows - Step-by-step guide
- Workflow Actions - Available actions including Filter